
As technomads – our mobile electrical systems are the lifeblood of our various nomadic homes.
After all – we need to keep all this technology powered up somehow.
And while stock RV and boat electrical systems are often perfectly useable (if somewhat limited) – whenever we embrace a technomadic home we just can’t resist diving in to upgrade our power systems to better meet our needs.
Today’s post is all about how we have taken Y-Not’s electrical system to the next level by adding solar, lithium batteries, and a hefty inverter to power it all.
But first, a glimpse at our past…
A Trip Down Memory Lane
Way back in 2006 I had added solar almost immediately to my original Tab trailer when I first hit the road – well before Cherie and I had even had our fateful first date.
As unromantic as working remotely on a first date might seem – if I had not been able to power her laptop off the sun I’m not sure the idea of mingling lives and working on the road together would have ever entered our minds.
When we designed our second RV in 2008 and had it custom built for us by Oliver Travel Trailers, solar and a relatively hefty built in inverter were central to the plan.
I even researched lithium batteries at the time, hoping to fit more capacity into such a tiny trailer – but it just wasn’t (yet) practical.
When we bought our bus Zephyr in 2011 it didn’t even have a functional house battery system – so we had to immediately dive into adding an inverter and batteries and getting off-grid ready in a mad scramble to be ready for attending Burning Man just a few weeks away.
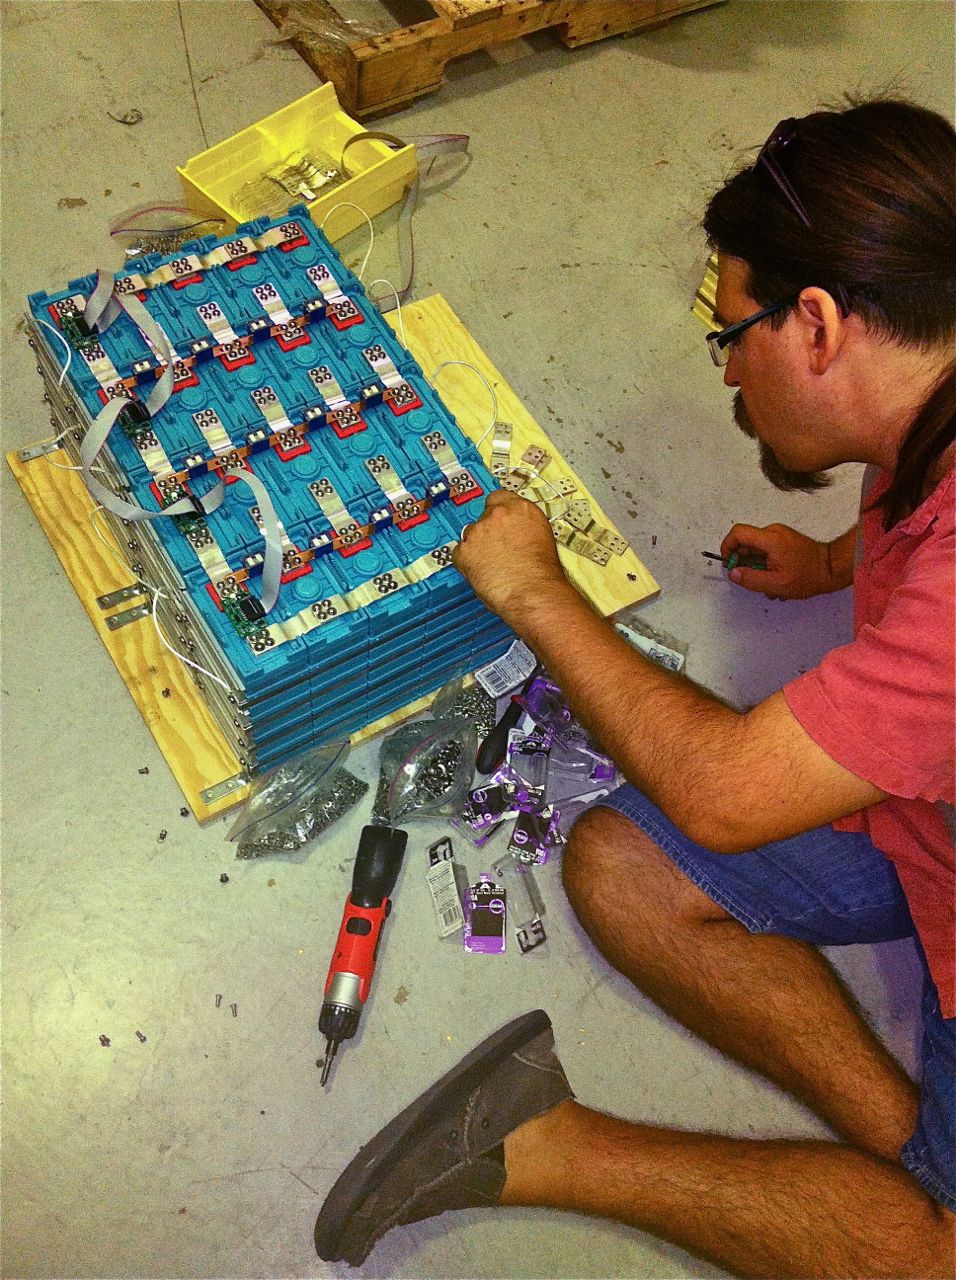
And this time around – lithium batteries repurposed from the homemade electrical vehicle world were just barely becoming practical for RV house battery usage, and it turned out that one of the major suppliers (Elite Power Solutions) was in Phoenix, just a few hours away.
So rather than taking the traditional AGM route, we found ourselves pioneering building our own lithium battery system from raw cells – and since we shared everything online we became well known for having one of the first documented lithium equipped RVs.
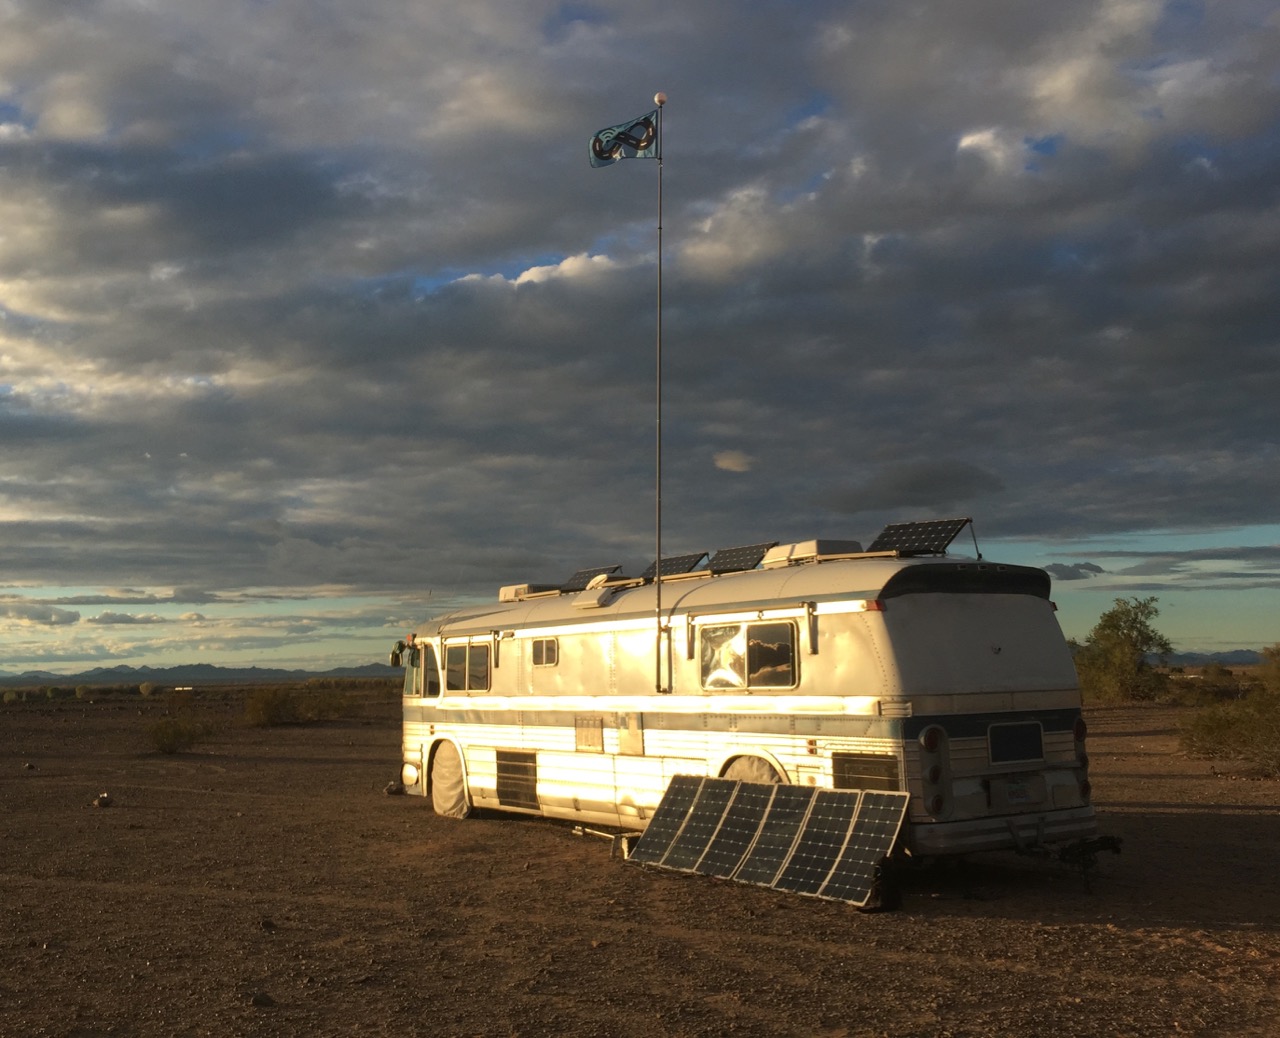
We eventually added 1,400 watts of solar to Zephyr, leaving us with a mobile home well suited to extended off-grid boondocking.
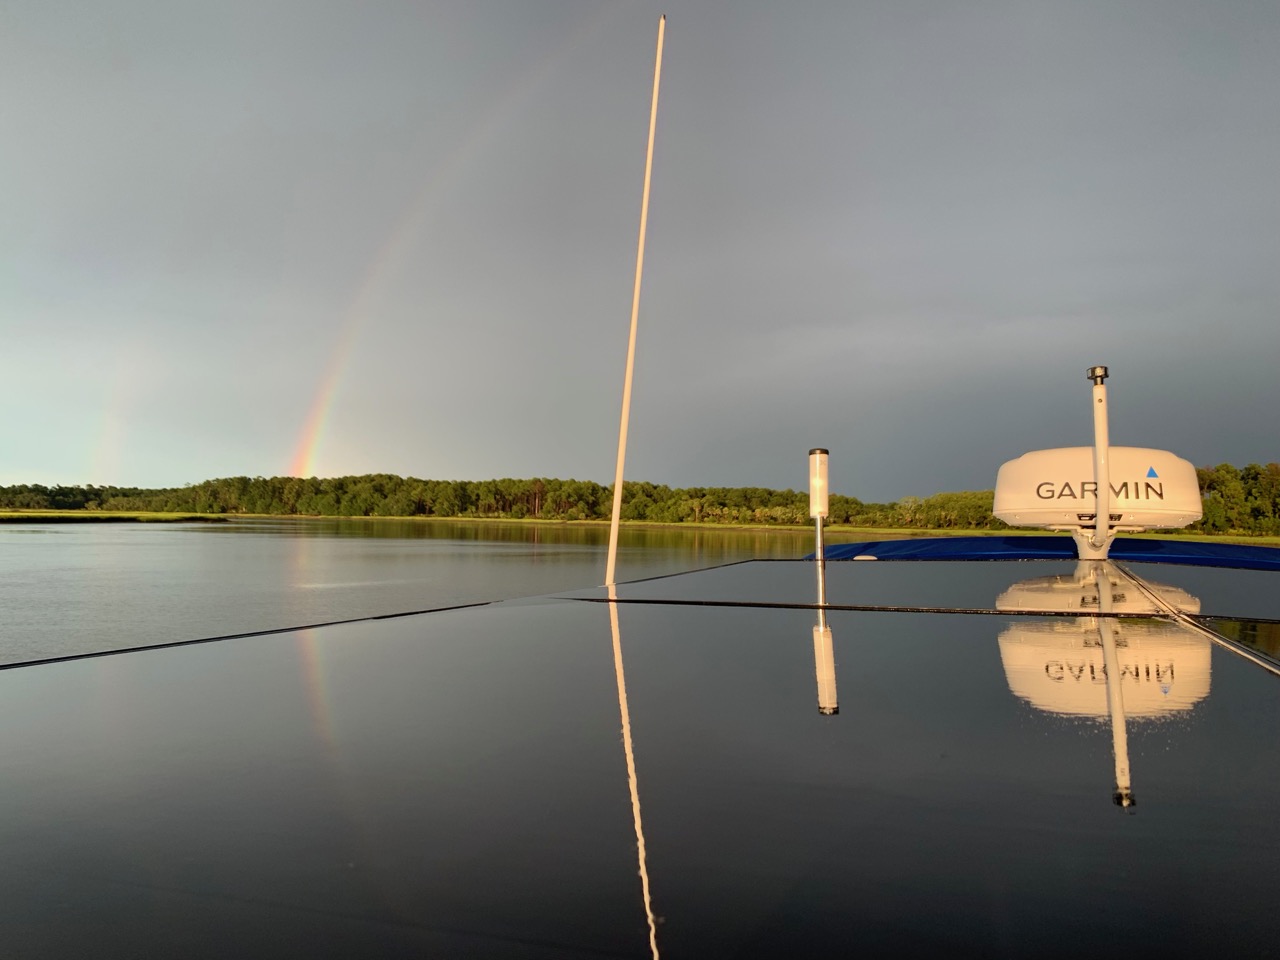
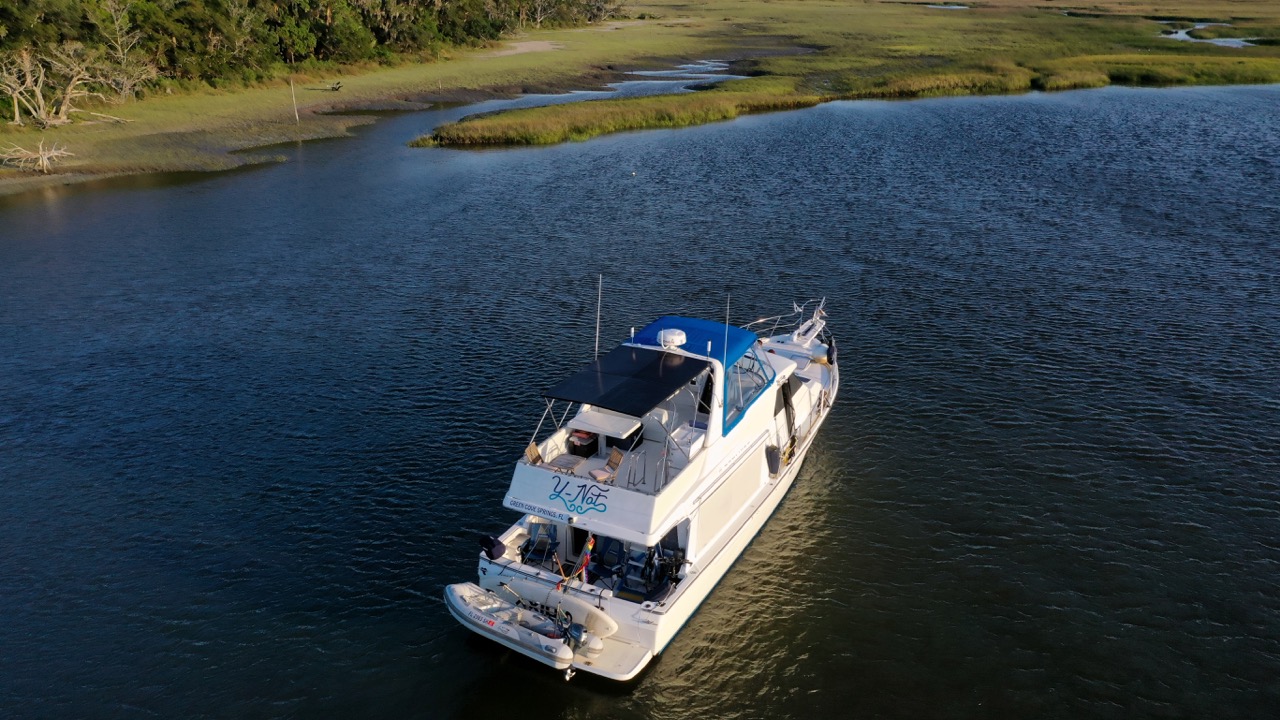
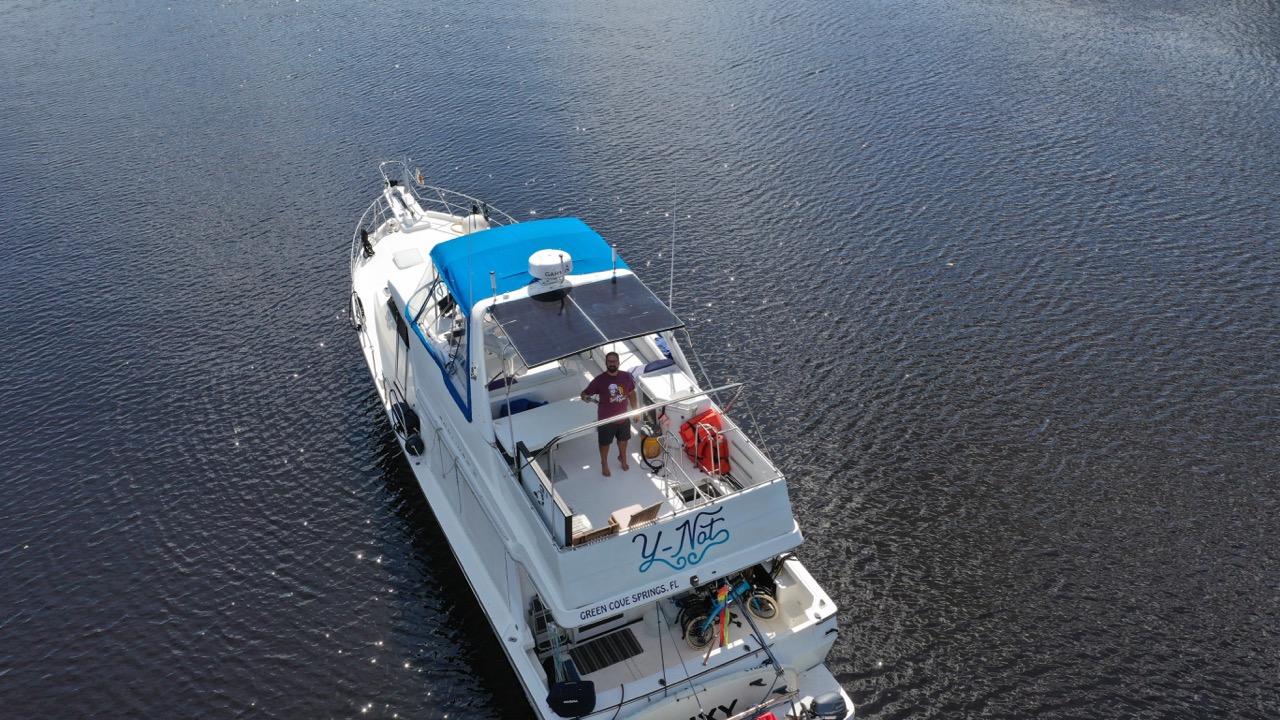
Enter Y-Not – our Bayliner 4788 Motor Yacht
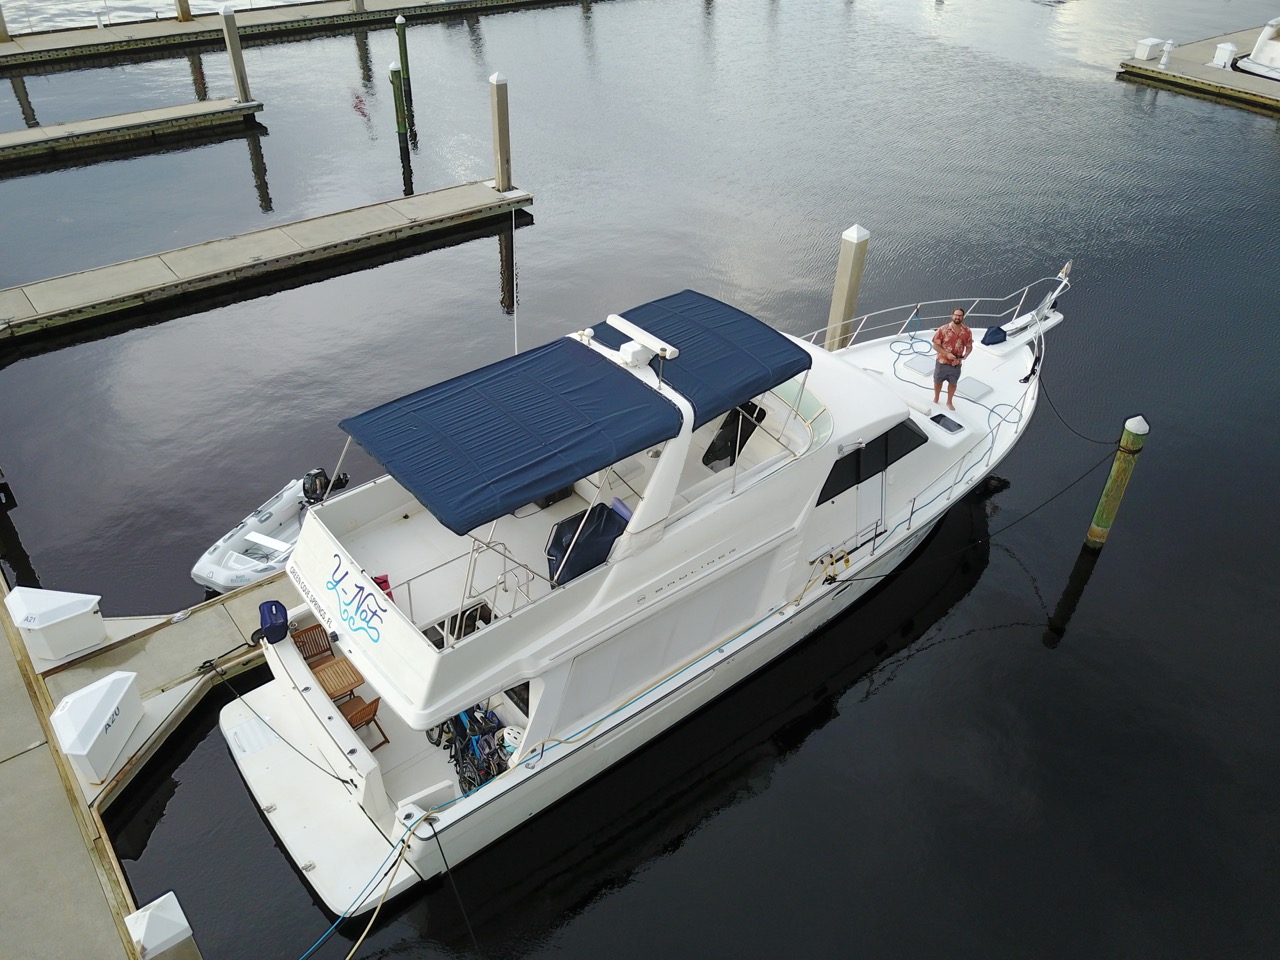
With solar and lithium as our background, when we moved aboard Y-Not of course we wanted to equip her too – as we described in our initial project planning post back in 2017.
We had actually sketched out our plans for a new electrical system and were literally moments away from ordering all the various parts, when a girl named Irma thoroughly derailed our plans.
The very day that we were set to meet a contractor to finalize our solar bimini design, we instead ended up prepping the boat for mandatory evacuation to prepare for a direct Category 4 strike!
It took a year to get back around to tackling Y-Not’s electrical system, but in the fall of 2018 our original lead house batteries were rapidly failing, and we had plans for an extended off-grid cruise up the St. John’s River.
We were not looking forward to needing near 24/7 generator for the trip.
So – in typical snowballing fashion, what started off as “lets just grab some cheap golf cart batteries at Costco” turned into “lets tackle rewiring the boat, installing a better inverter, and preparing for lithium” to “what the hell – lets just do this once: switch our house bank from 12V to 24V and go lithium too!”
We managed to get the battery upgrade and inverter done just in time for our river trip last October.
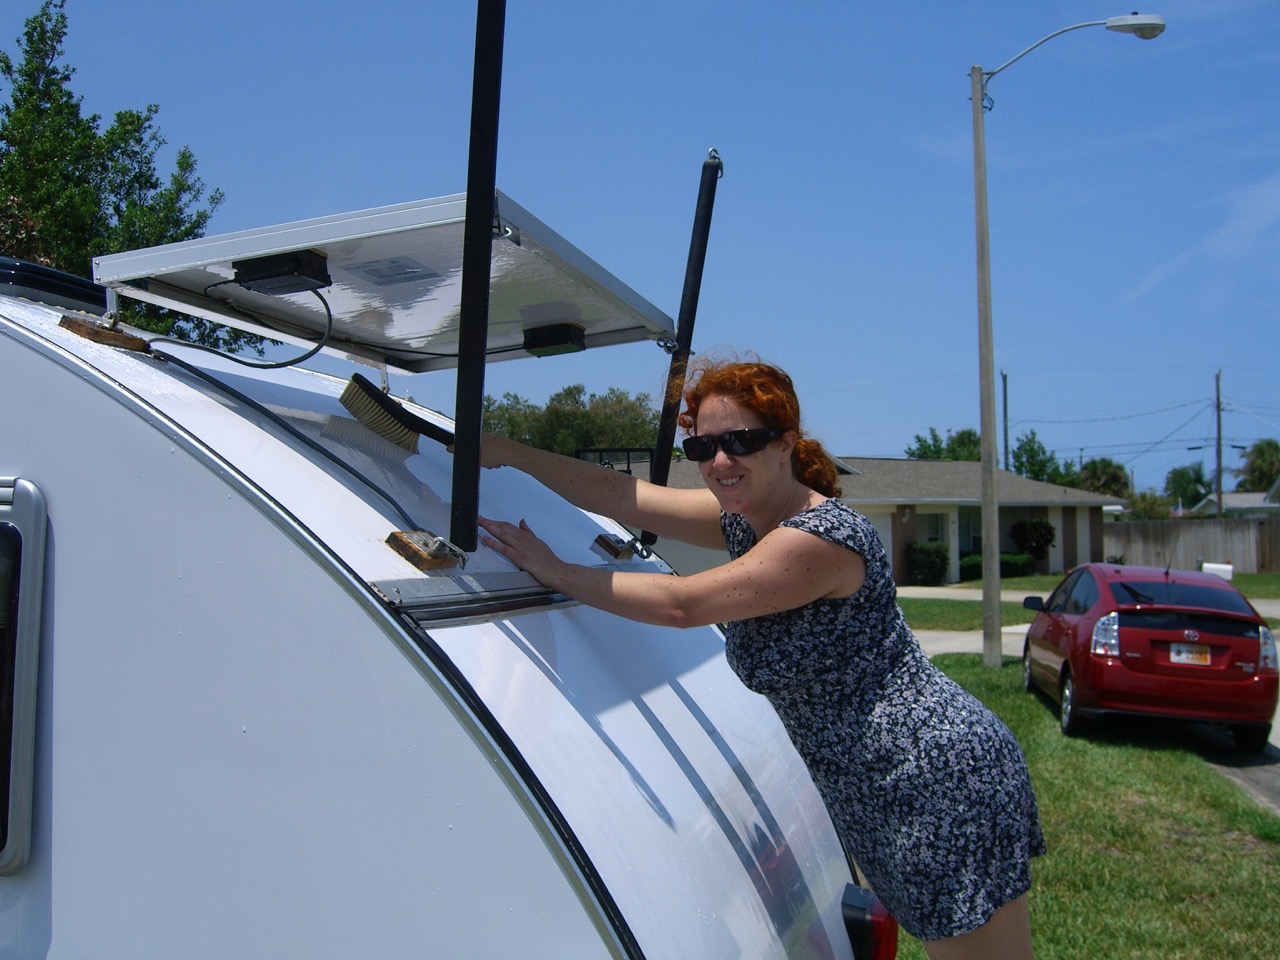
The solar had to wait for our trip back down the river this spring, but due to some contractor complications in Sanford we ended up with just half of our panels installed – MacGyvered together in a temporary fashion with ratchet straps and pool noodles.
We found a contractor in Jacksonville this April who helped us properly finish Y-Not’s solar system, getting all four panels mounted just in time for our cruising adventures this summer.
Now that we’ve had some time living with the fully functional system – it is time to share a tour of it all, and some of the thinking behind why we picked the various components that we did.
This is a geeky topic – but we’ll focus on keeping it high level and enjoyably skimable for those who don’t want to dive too deep.
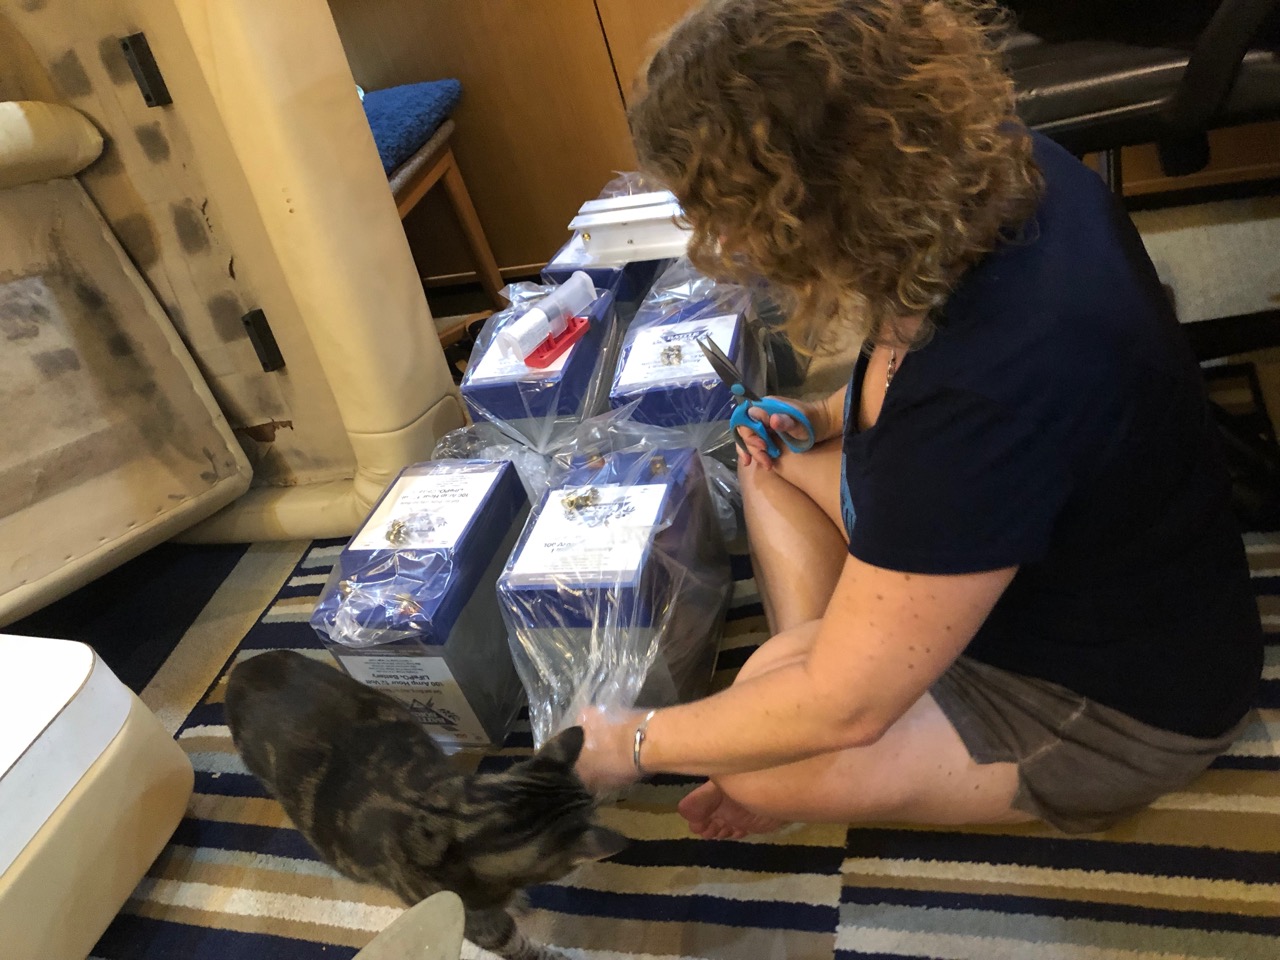
But first off – here is the video version of the tour, which is nearly 50 minutes long! It includes lots of footage from various stages of the project, and of course extensive cat cameos.
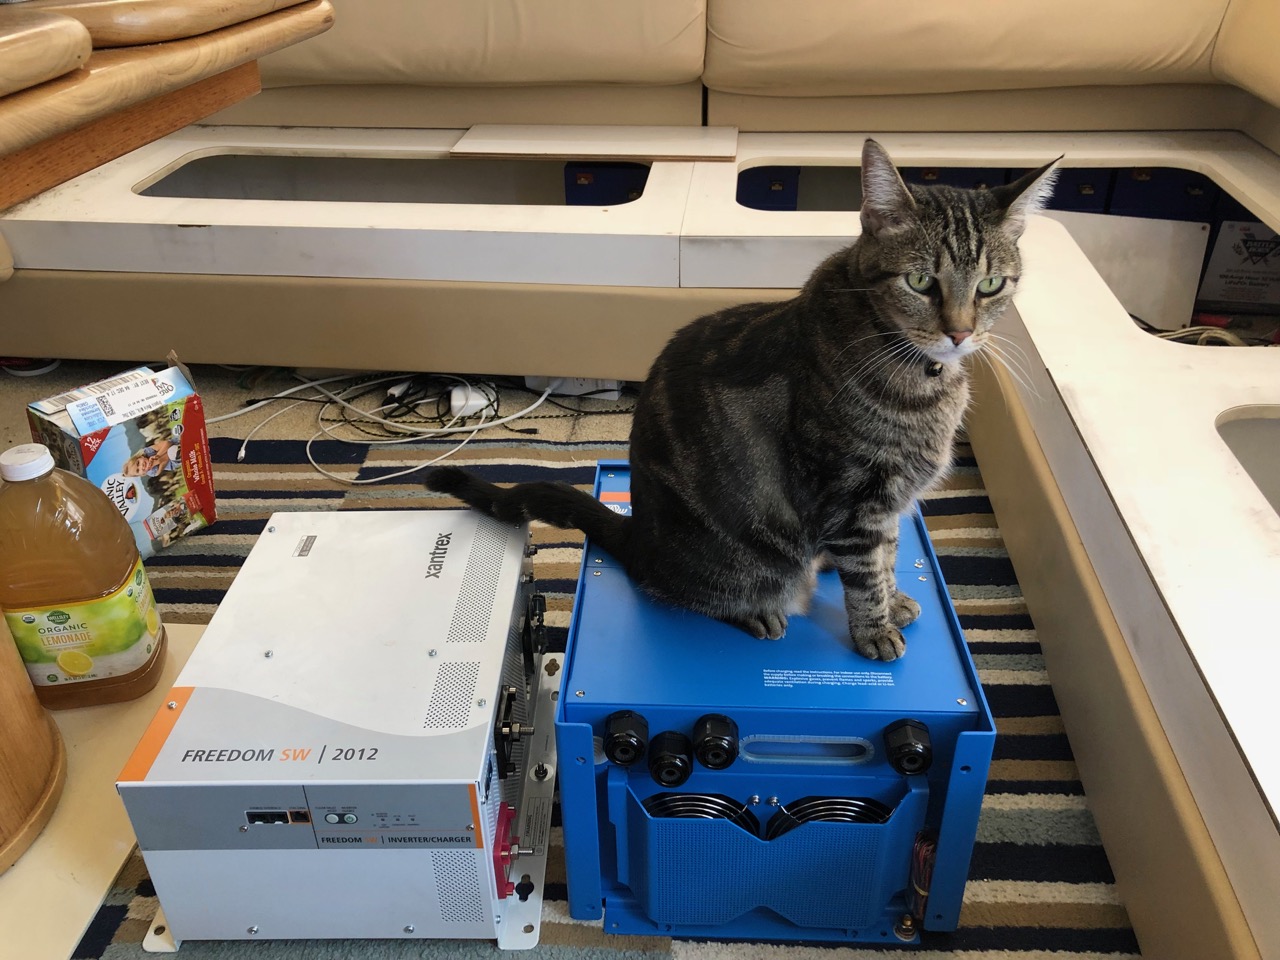
Kiki is the true electrical expert on board, after all…
Disclaimer:
We are sharing the details of our personal project – but we are NOT experts offering advice or recommendations on how you should tackle your projects. Do your own research, and draw your own conclusions.
Except where noted, we purchased all the components of this system on our own. Some external links in this post may be affiliate links – which means we would get a little ka-ching if you purchase anything using them. Thanks!
Why Lithium? Why Solar? Why Go 24V? Why Even Bother?
The first question to tackle is… why?
Well, our boat’s name is Y-Not .. that should be reason enough.
And – we love technology, and exploring what it can enable. Not everyone will find reasons to follow in our wake, but we love to share our process to potentially inspire others.
We’ve already seen some of our initial experiments become more mainstream in the RV world. Solar and lithium were both once considered exotic and strange, and now they are increasingly available as factory options – and even standard on some models!
In the sailing world solar is common – but we’d love to see solar and big lithium banks become a more common sight on motor yachts too.
The technology is there – and we think it is worth it.
Why Lithium?
We’ve written at length in the past about the many many advantages of lithium battery systems, so rather than repeat everything here – please refer back to some of our classic articles from 2011:
Promise of Lithium #1: Lead Acid Battery Downsides
Promise of Lithium #2: Lithium Ion Battery Advantages
Promise of Lithium #3: Cost Analysis (including our part list)
And all of the rest of our past lithium focused posts chronicled here:
https://www.technomadia.com/lithium/
But in a nutshell compared to traditional lead batteries – lithium iron phosphate (aka LFP) batteries suitable for use in building large RV or boat house battery banks have some substantial advantages.
LFP batteries allow for more energy storage in less space and with much less weight.
With LFP batteries – you can actually make use of the full capacity of a battery bank without killing it, you can charge quicker and more efficiently, and the batteries are perfectly happy if they do not get charged to 100% regularly.
Lithium’s advantages are particularly compelling when paired with solar or generator provided power since you do not need to waste time and energy with a long absorption phase to top batteries off – which lead batteries require regularly to stay healthy.
Lithium batteries can bulk charge at full speed right up to near 100%, and they keep outputting full voltage all the way to near empty when draining them.
Of course LFP batteries do have a downside – they can cost more up front (though potentially with a lower lifetime cost), and they do need to be treated right to thrive.
But overall LFP batteries make a great house battery system foundation – better than lead in pretty much every way.
Why Solar?
The reasons for solar should be obvious – magical free power from the sun!
Eco-friendliness and the economics of solar are awesome of course, but they aren’t the primary reasons for us.
For us, it is the silence and the simplicity.
Even the quietest generators still detract from the wonderful sounds to be found while swinging at anchor or out in nature.
The sounds of the wind, birds, dolphins splashing, waves in the distance.
We want to maximize time listening to that, and minimize time listening to a generator hum.
There will always be cloudy days, or days you need more power than the sun can provide. But it is nice to have enough solar so that generator usage becomes minimal and infrequent, rather than a major part of every day.
The simplicity of solar is a huge win too – it is always working, making power from dusk till dawn.
But the important thing with solar is to remember that it rarely makes sense as the only power source, whether on a boat or an RV.
There will always be cloudy days, or days you need more power than the sun can provide, of course.
But it is nice to have enough solar so that generator usage becomes minimal and infrequent, rather than a major part of every day.
For more musings on if solar is right for you:
Why Go 24V?
The other somewhat unusual part of our project was switching our boat’s house battery bank from 12 volt to 24 volt.
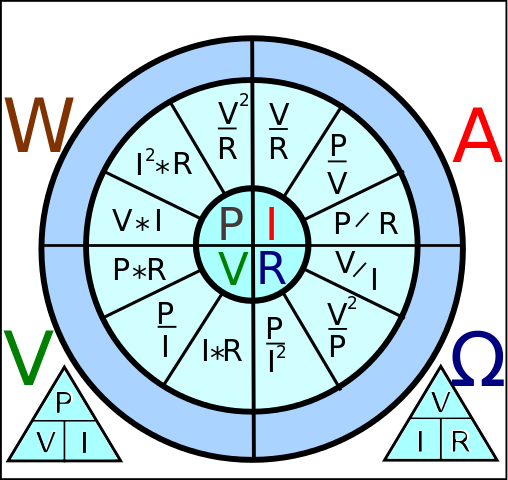
The advantage comes down to the basic electrical formula:
Power (Watts) = Current (I) * Voltage (V)
What this algebra means is that if you double the voltage in an electrical system, you can transmit the same amount of power down a wire using half the current.
In practical terms that translates to smaller wires (important when pulling them in small spaces), and smaller (and often cheaper) electrical components.
Twelve volts is plenty for low-power systems like most traditional on board DC systems.
But if you want to power an inverter, suddenly you need prohibitively large battery cables to safely transmit that much power. And if you want to have a large inverter capable of powering things like an air conditioner, moving that much power at 12V is getting increasingly impractical.
Doubling the system voltage to 24V makes everything so much easier.
48V is even better still if your primary concern is just powering an inverter.
But 24V is particularly well suited for house battery systems, since many high-current loads like marine refrigerators and freezers are designed to run directly on 12V or 24V (but not 48V), and they will run most efficiently on 24V.
It made sense for us to dive into 24V for these reasons:
-
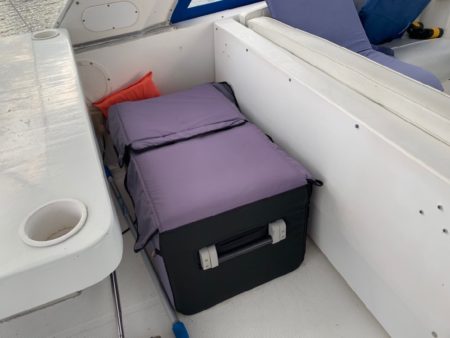
We love our Dometic freezer. Our Dometic CFX-100 chest freezer (provided by Dometic) can run off 12V, 24V or AC.
- Our future planned fridge upgrade (ours is currently a standard AC powered residential fridge) will run directly off 24V.
- A big inverter designed for 24V would be cheaper and more efficient than a 12V equivalent.
- We were moving the battery bank location and would be re-wiring, so smaller wires would make things a ton easier.
We’ll talk more about the 12V versus 24V tradeoffs in the inverter section below.
Y-Not’s Solar System – 1,440 Watts Up Top!
Starting at the top… our solar panels!
Solar panels vary substantially in cost, quality, and efficiency – and there are an overwhelming number of options.

Early on – we were considering using flexible solar panels that could be stitched or integrated directly into our bimini canvas. But based on our experience testing thin and flexible panels back in our RV days, we were not impressed with their long term durability.
And we knew we wanted a large solar array – and getting 1,000+ watts on our roof made out of flexible panels would have required the potentially impossible complexity of jig-sawing together 10-20 small panels onto canvas.
Large glass panels designed for residential installation made for much simpler high-wattage install – and though they are not specifically “marine” we could see no worthwhile reason not to use panels like this on our boat.
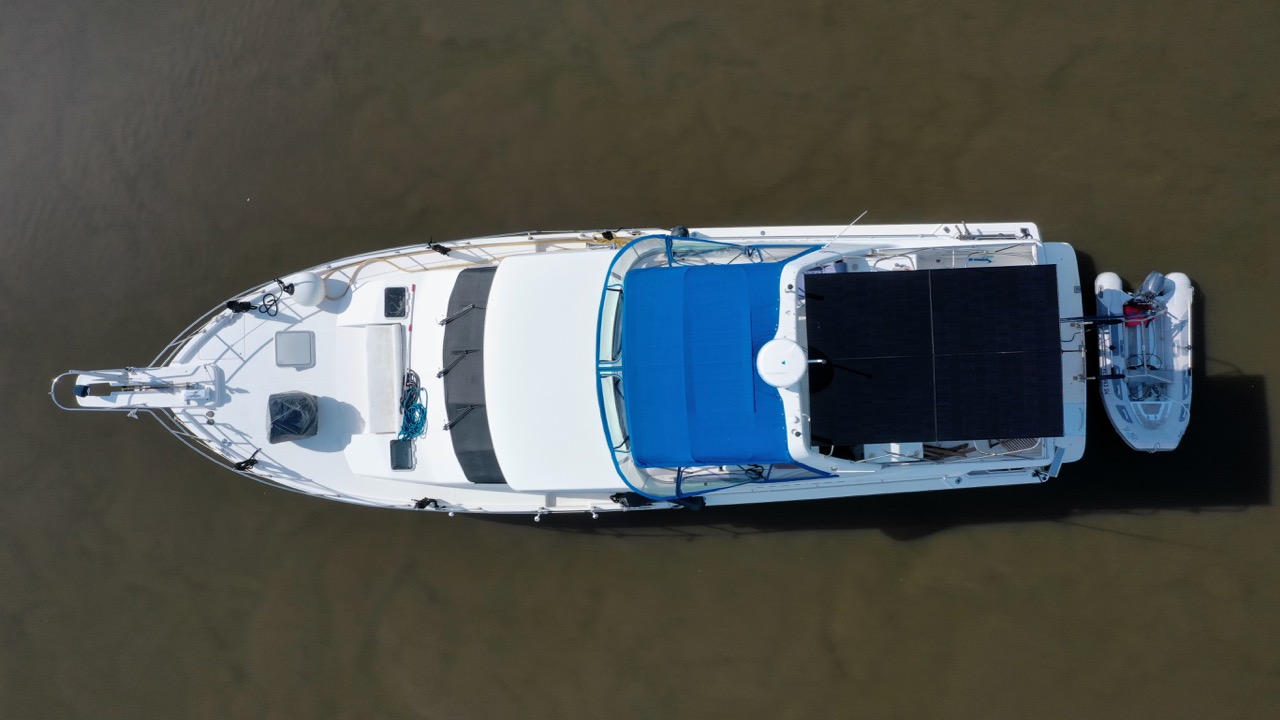
Looking at full-size residential glass panels, we realized we had the space to fit at most six panels on Y-Not – four behind the radar arch, and two in front.
With the most efficient 370W SunPower panels available on the market, that meant we could conceivably manage 2,220 watts of solar at the absolute most – an amount that would handle pretty much all of our needs other than air conditioning, and even potentially some of that.
But SunPower panels are expensive, and are hard to acquire as an independent consumer.
And we realized that since we only physically had space for six panels in this size range – efficiency wasn’t a prime driver.
By going with six slightly less efficient (and thus slightly physically larger) 360W panels we would still have nearly as much power, and it would still fit without much compromise at all.
The original plan was to have the glass panels float on mounts above our bimini canvas – which would required some complex canvas work.
But then we had the realization… why?
Why pay for expensive new canvas that would be 90% covered by solar panels anyway?
Why not use the solar panels themselves as a hard top flybridge roof? After all, we find the look of solar panels to be pretty darn snazzy.
And though it meant giving up a substantial amount of our potential generating capacity – we decided to just do panels on the rear of the arch.
In front of the radar arch we would go with traditional canvas and vinyl windows giving us a decent weather-protected area.
And behind the radar arch the solar panels would become the roof.
This made the project a LOT simpler to approach, without needing to find the seemingly magical combination of a canvas maker and metal fabricator who could coordinate both projects at the same time. And it keeps the arch a lot simpler to still fold down when needed.
With this new design in mind – the dimensions of the solar panel became critical.
This is what lead me to Solaria – which may not have been as top-ranked as Sunpower, but which was still in the top five on most charts of panel quality and efficiency.
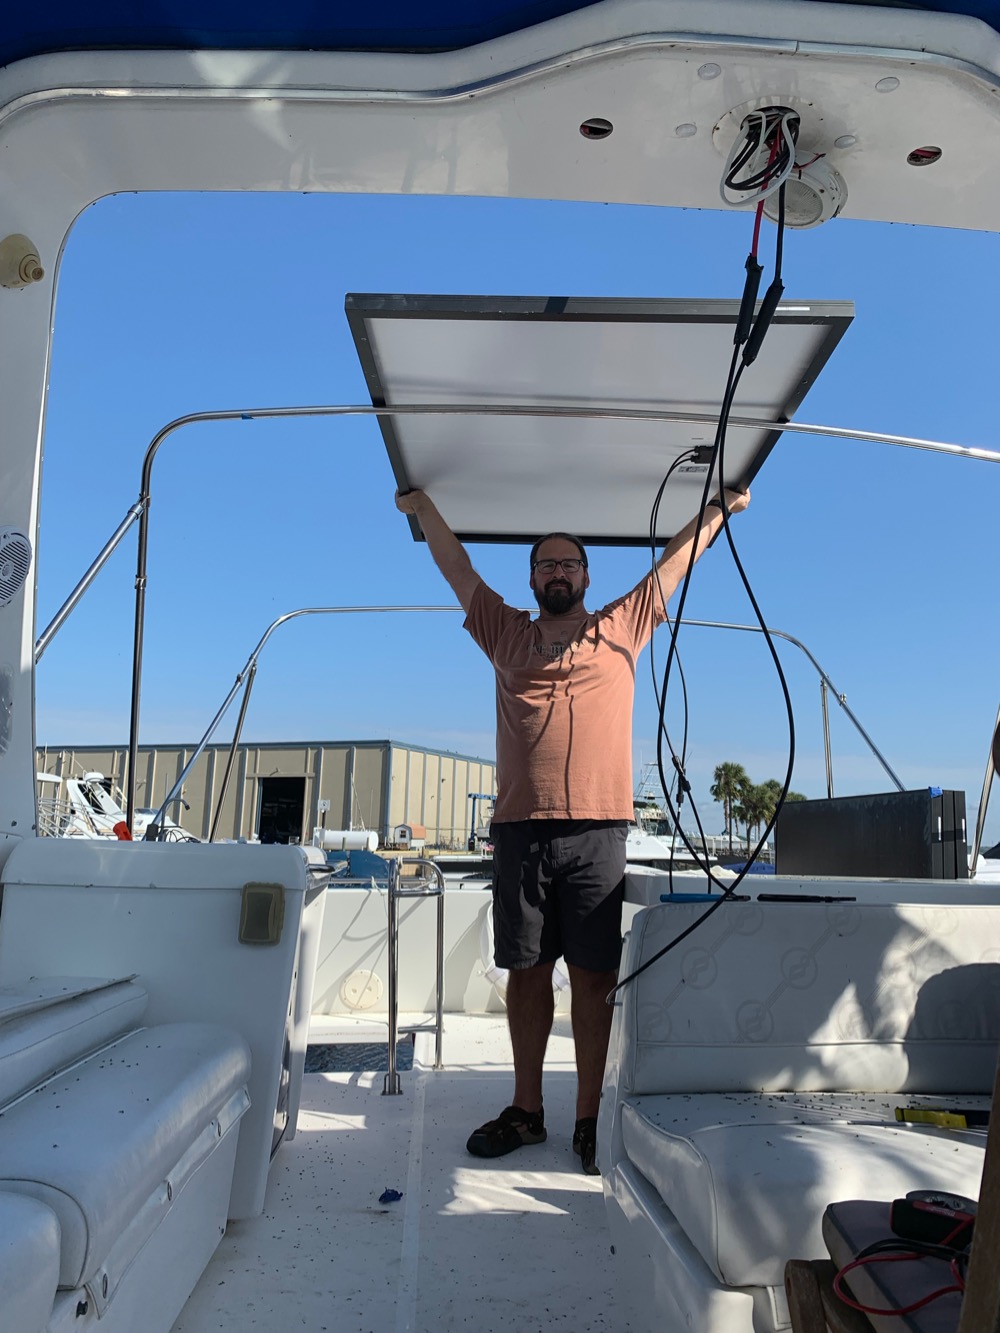
I found the Solaria PowerXT-360 360W panels were 44″ across – wider than other residential panels, giving us more shaded area. Four of them clamped together would work as the ideal roof for the rear of our flybridge.
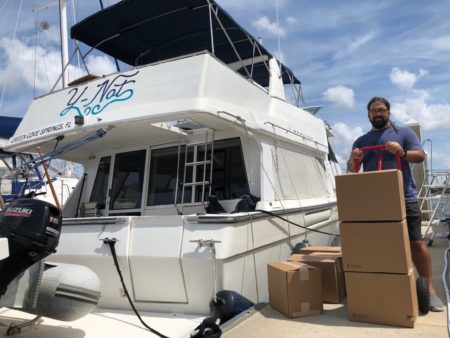
And – they were exceptionally affordable – I found them for sale online at A1 Solar Store for just $366/ea, and available with same week freight shipping right to our dock.
Mounting The Panels
While we were in Sanford over the winter we called around to find a metal fabricator who could help us build a frame to hold our four panels securely.
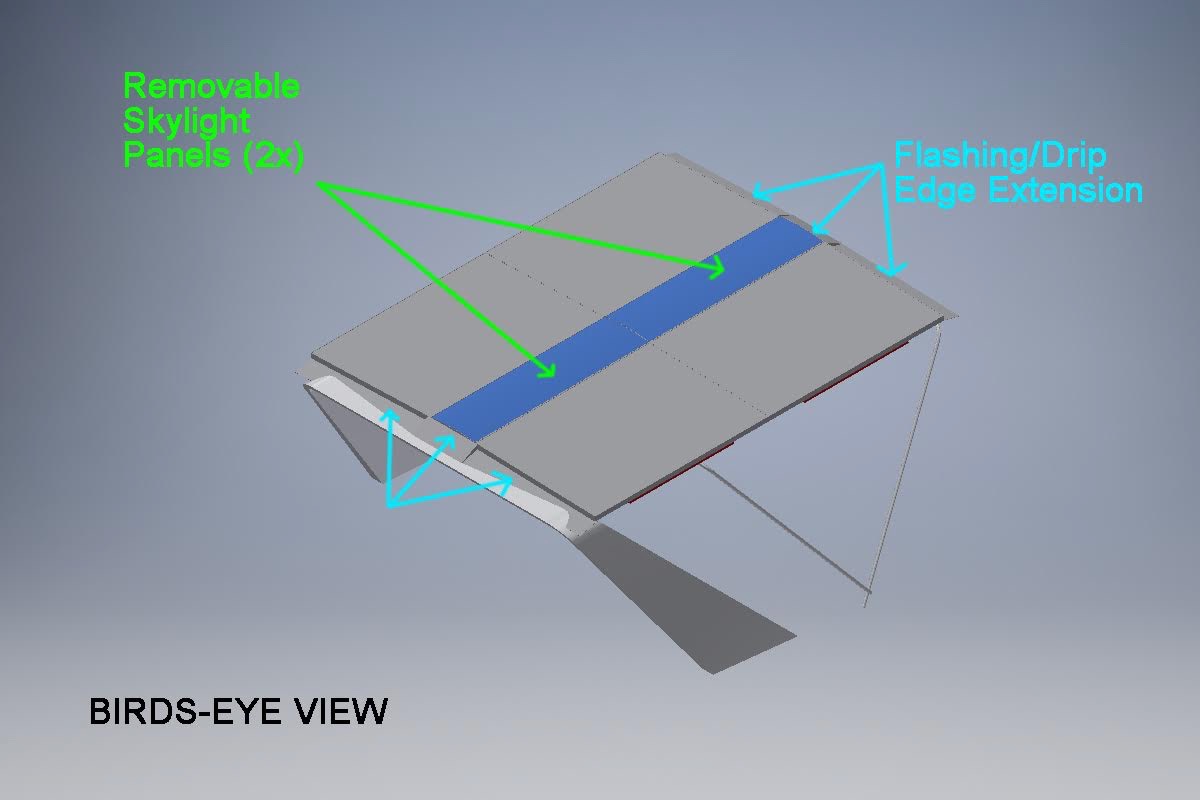
We found someone who was excited by the project – and we jointly came up with an ambitious plan that would feature a removable center skylight down the middle to push the panels further to the sides of the boat, making a larger covered area.
There would be gutters to direct rain too, making the rear flybridge both shaded and dry.
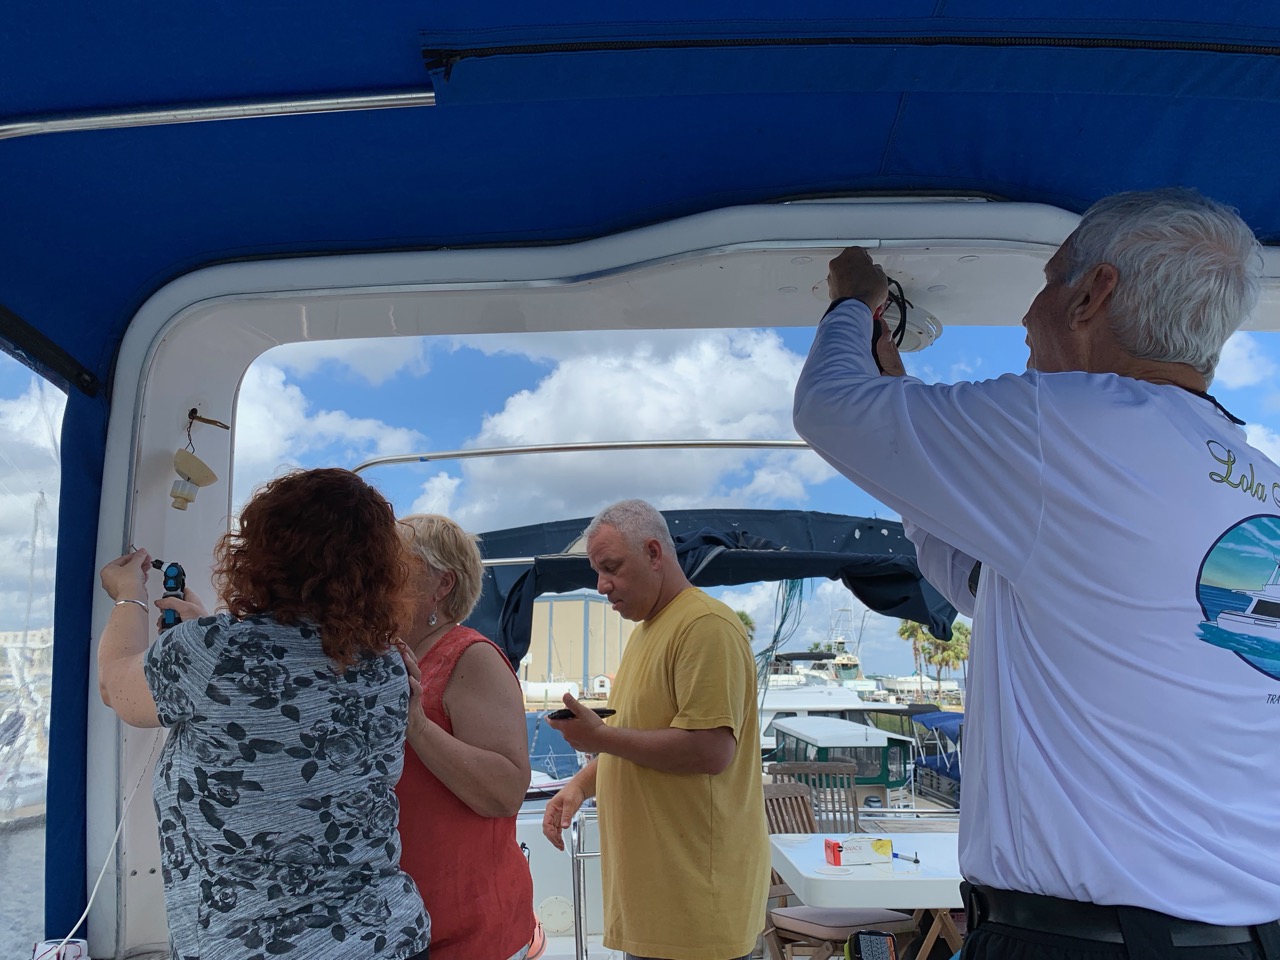
With the project underway, some friends (thanks Joe and Ron!) spent a weekend with us helping pull wires to prepare for final installation.

Unfortunately – the dream project overwhelmed the new-to-marine fabricator, and he backed out of the project at the very last minute – leaving us with four unmounted panels and a 12-day planned off-grid cruise back Jacksonville.
Our friend Joe came back, and together we came up with a pretty ingenuous temporary mount for two of the panels – using ratchet straps and pool noodles to hold the panels on.
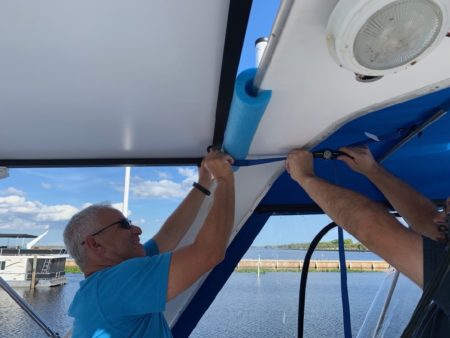
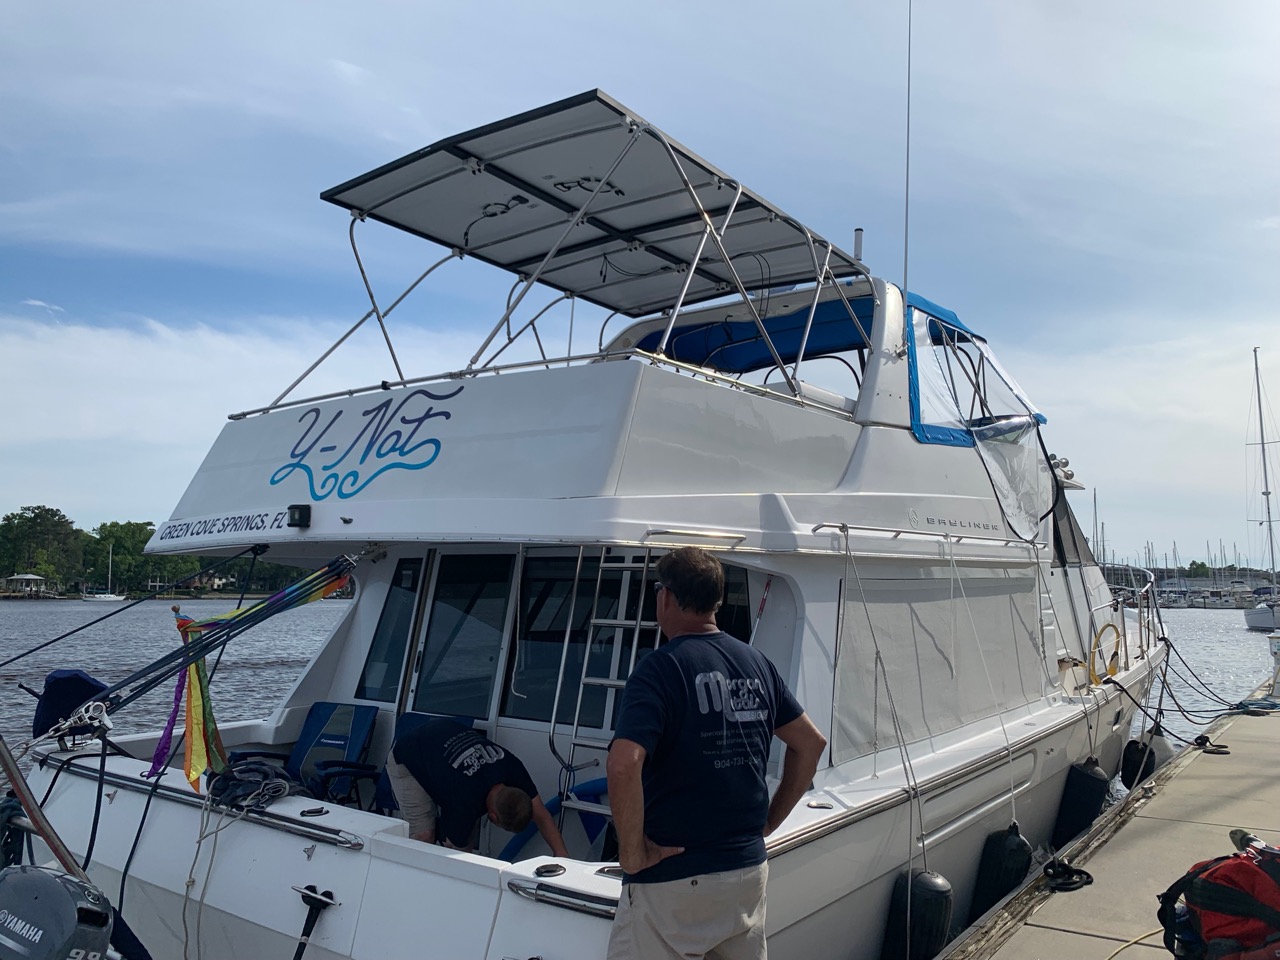
Once we arrived to Jacksonville, we contracted Morgan Metals & Design, who has tons of marine stainless experience, to tackle some very simple modifications to our existing rear bimini structure to make it flat and secure enough to clamp all four panels to.
We attached all the panels to the frame using SeaDog Removable Rail-Mount Clamps – allowing us to dismantle the solar panels in the future relatively easily if ever needed.
The end result has been fabulous – and has held up well to some high winds and bouncy passages.
And yes.. we can un-attach the rear mount from the radar arch to fold the arch down and still clear 15.5″ bridges without too much fuss, leaving the panels up.
If we need to clear even lower bridges (perhaps someday when we cruise the western Erie Canal), we would just unclamp the solar panels and dismantle the system temporarily for a week or two.
The Victron MPPT Solar Controller
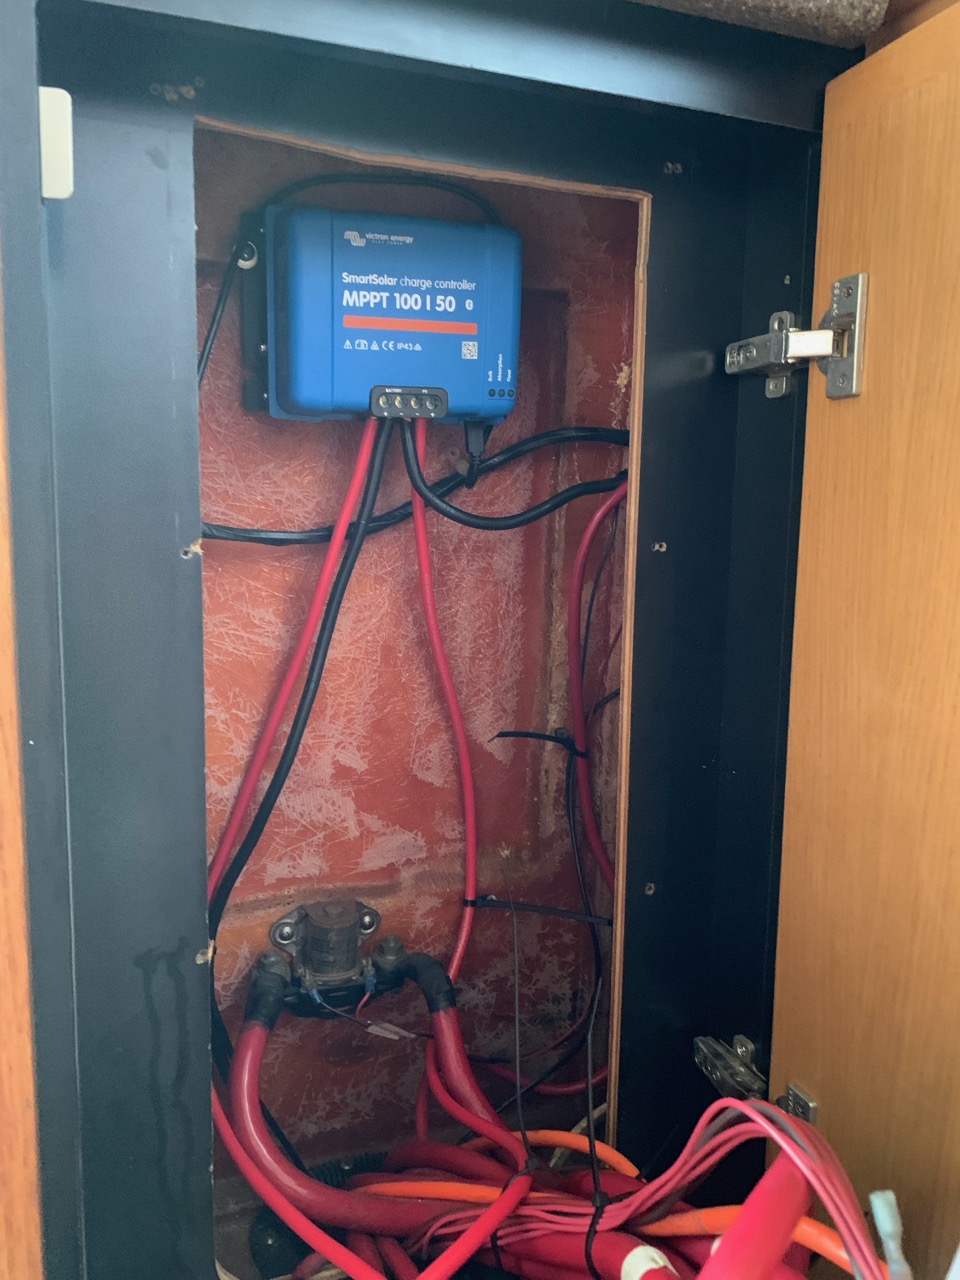
For the solar controller – our obvious choice was the Victron SmartSolar MPPT 100/50.
We’ve used Victron solar controllers on our bus, and the newer SmartSolar models have a very snazzy Bluetooth interface for easy remote monitoring and configuration from a computer of via an app.
The MPPT 100/50 can handle up to 50A charging output, connected to either 12V or 24V batteries.
This is a great example of where switching to a 24V battery bank paid off, since with a 12V battery bank it would have taken two of these solar controllers to handle the charging amperage from our 1,440W solar array.
Using a 50A controller however does mean that if we ever want to add two additional solar panels, we would need to remove the controller and upgrade to physically larger and more expensive MPPT 150/70 or MPPT 150/85.
We considered that potential upgrade so far off into the future that it wasn’t worth designing for it now.
Solar Wiring
Running wires down from our solar panels to the solar controller would have been a challenge, but I discovered that there already was heavy gauge wire going where we needed it that had been intended for the standard Bayliner 4788 dinghy davit crane, which our boat never had.
I was able to repurpose this wire for the solar panels, and mounted the solar controller inside the wall behind the master battery cutoff switches – giving an easy heavy gauge route from there directly to the new battery chamber.
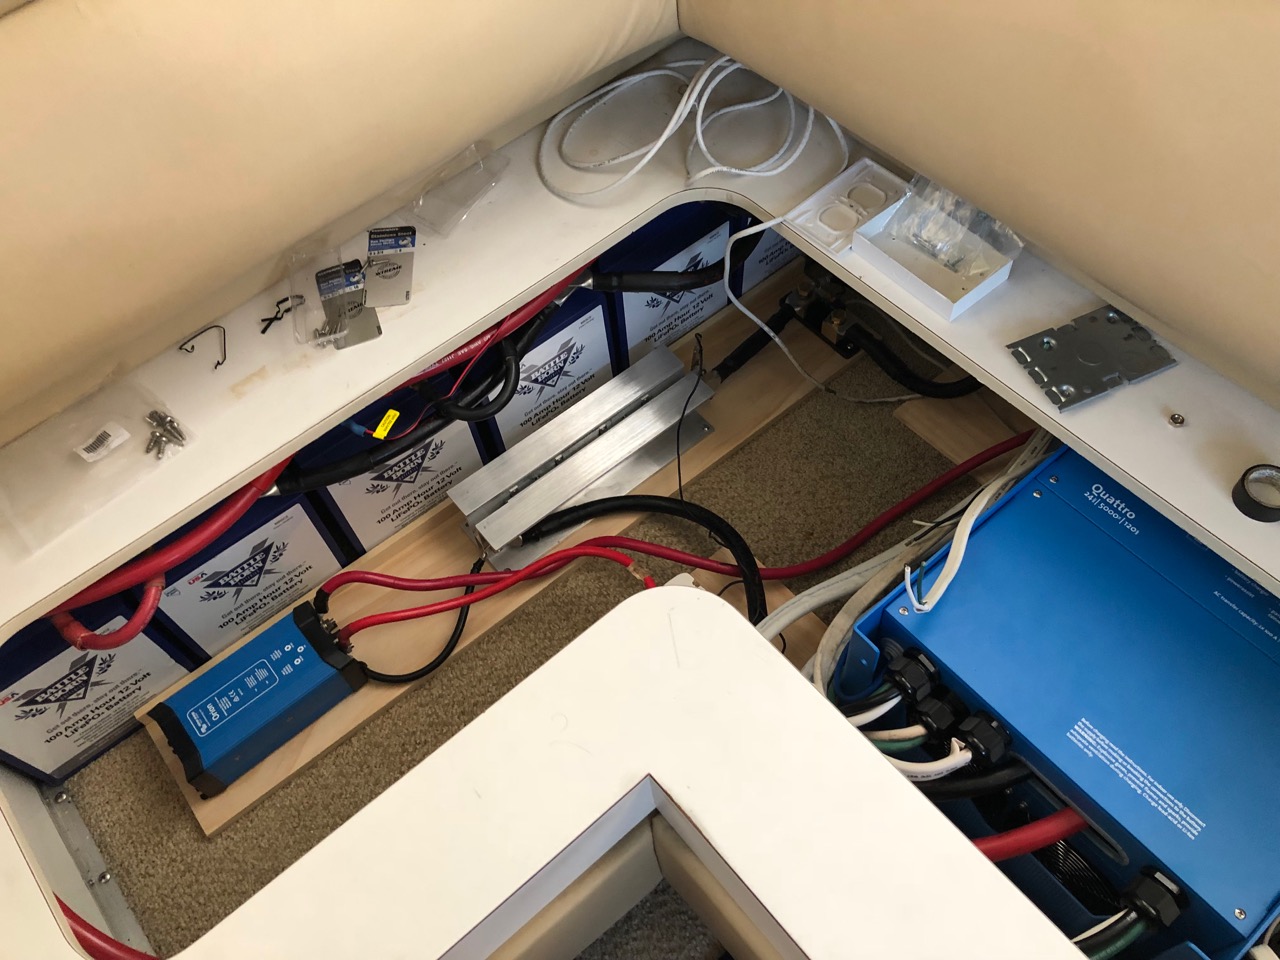
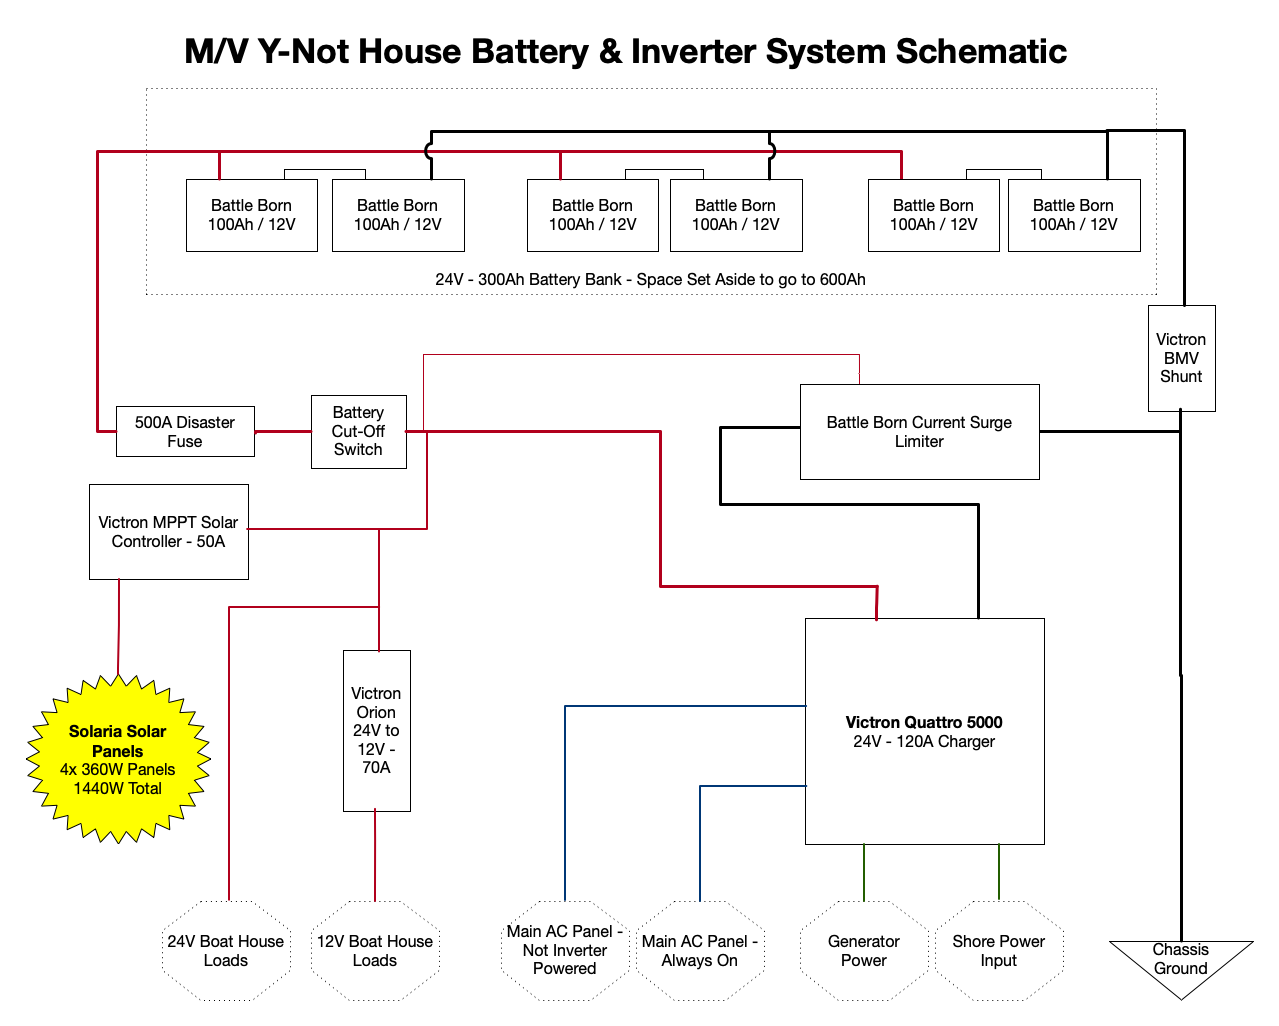
Y-Not’s Battery Bank – (Currently) 300Ah @ 24V
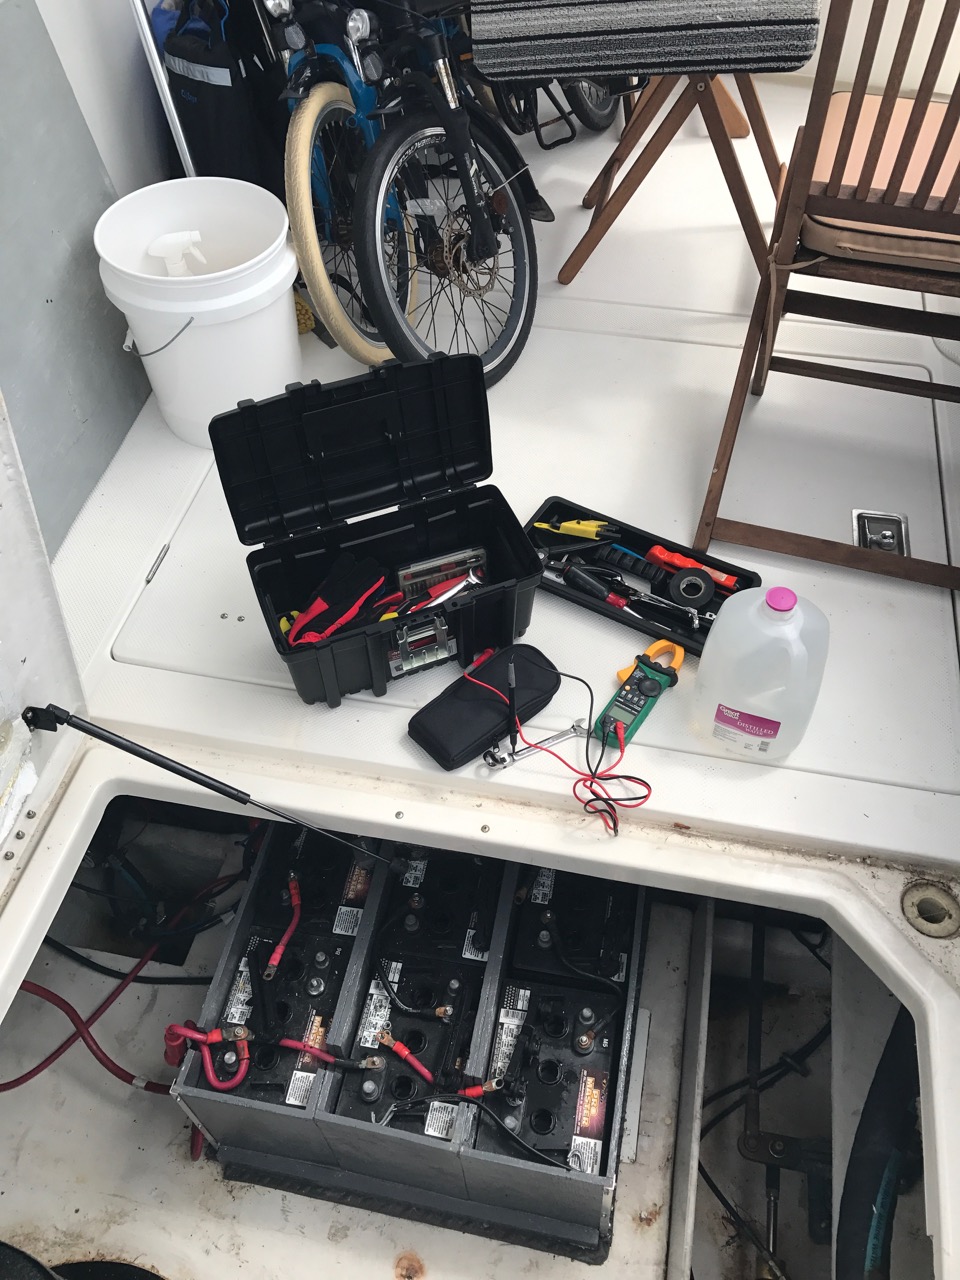
Our boat’s house battery bank had originally consisted of six 6V 215Ah golf cart batteries, located in the lazarette beneath the cockpit.
This added up to a 645Ah 12V system weighing 360lbs, with only 320Ah considered “useable” based on the rule of thumb that lead batteries should only rarely be drained below 50%.
This battery chamber under the cockpit is open to the heat of the engine room and the adjacent generator, and it is also exposed to water dripping down from the cockpit above.
In other words – not an ideal place for an expensive and temperature sensitive LFP battery bank. We already learned our lesson about how heat decreases the capacity of LFP prematurely in our initial bus installation.
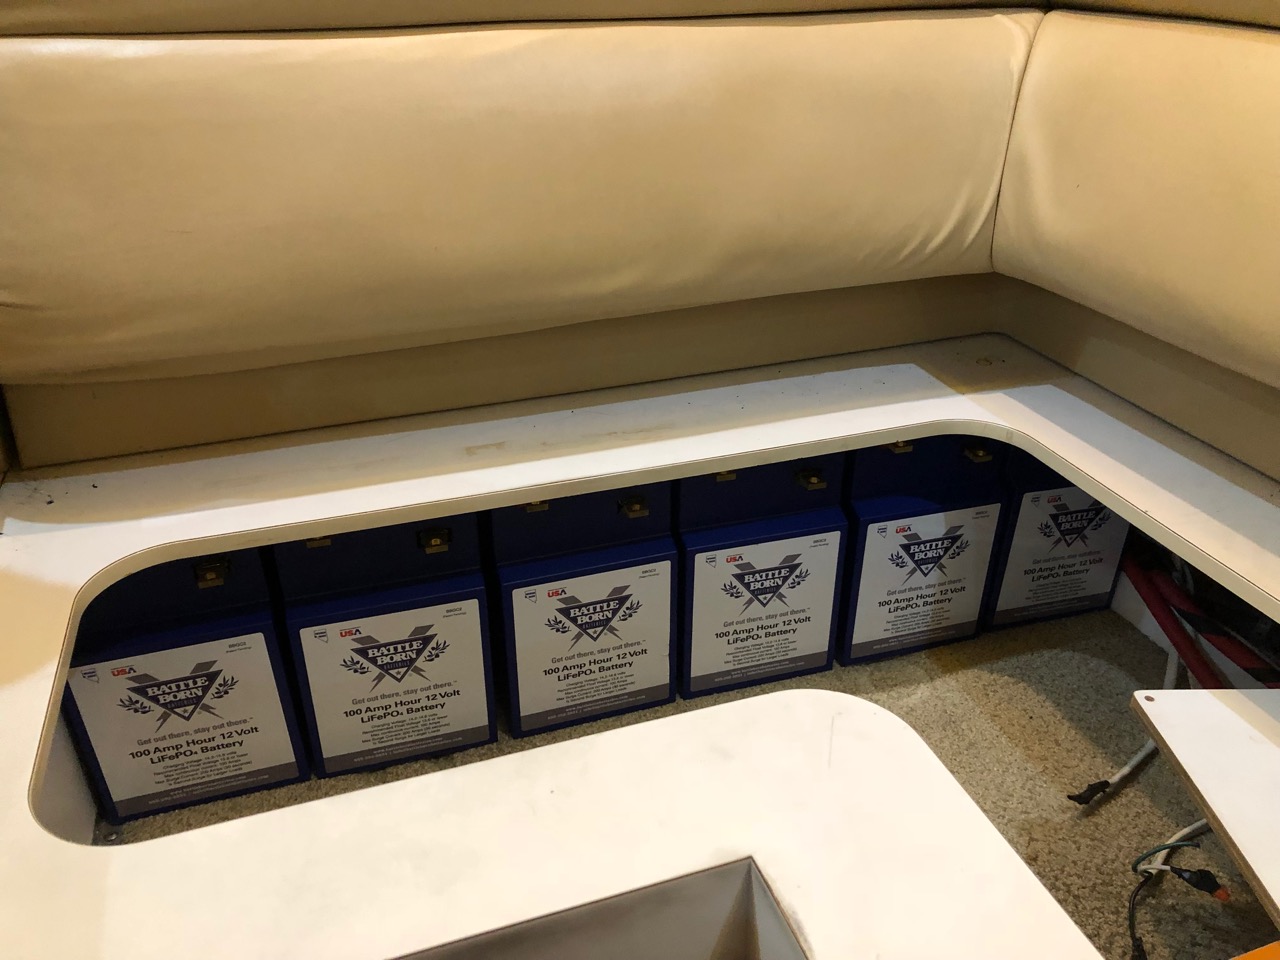
Instead – as part of this project, we decided to relocate the batteries beneath the corner segment of our salon sofa. In this space under the sofa we had a chamber 11″ high x 21″ deep x 43.5″ wide perfectly suited for batteries.
But what batteries to use?
And what battery management system (BMS) to protect them?
These are the basic options for anyone interested in building a lithium system:
- Basic Cells & External BMS – Combining basic lithium cells with an external BMS has gotten a lot easier than when we dove into relatively uncharted waters building our bus system, and there are a lot of interesting cell options and BMS setups available – sometimes even sold in kits that make it (relatively) easy to mix and match appropriate parts.
- Salvaged EV Batteries – If you’ve got the time and skills, there is no better bang-for-the-buck than tracking down a wrecked Tesla Model S and salvaging the battery. But this is a very advanced project, not for beginners! Our The RVer’s co-host Tom from Mortons on the Move has collected a lot of details on using a Tesla battery in an RV here, and the Second Life EV Batteries Facebook group is a great online forum for swapping tips. But do NOT dive into this sort of project unless you really understand what you are doing!
- Professionally Designed Battery Systems – Not everyone is up for tackling the electrical engineering required to source various components and roll their own battery setup. Fortunately, there are companies that sell and support packages where all the components are designed to work together from the start. We are most aware of Victron’s options here (resold for RVers by AM Solar), but there are others out there too with solid reputations.
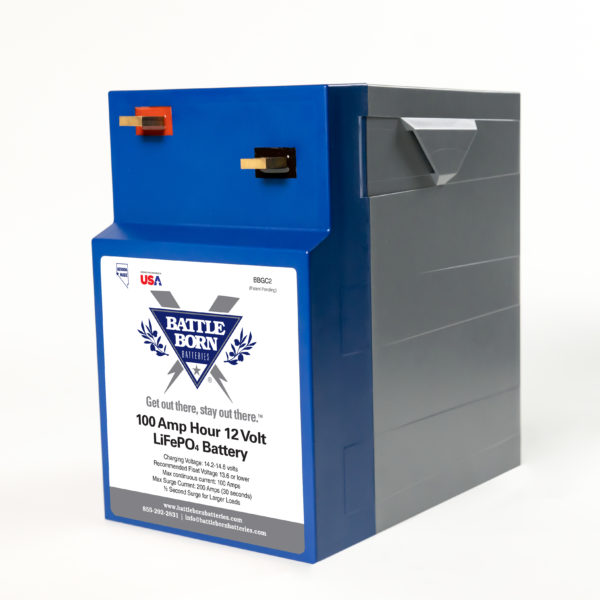
- “Drop-In” Integrated BMS Batteries – These systems combine the batteries and BMS into one unit that can be easily integrated with existing electrical systems. With a drop in system like this, it is now vastly easier for people who want to tackle adding lithium on their own. Several manufacturers such as Battle Born and Relion have built up good reputations for offering mostly foolproof setups that you can drop in to replace regular lead acid systems without much extra design work at all.
So what path to choose?
For someone who wants to tinker and who honestly enjoys geeking out with electrical systems, starting with raw cells or salvaged Tesla battery packs can be a fun (and time consuming) approach. But you really need to know what you are doing.
And for someone who wants to build a huge custom well integrated power system – starting with Victron batteries and external battery management system is the way to go.
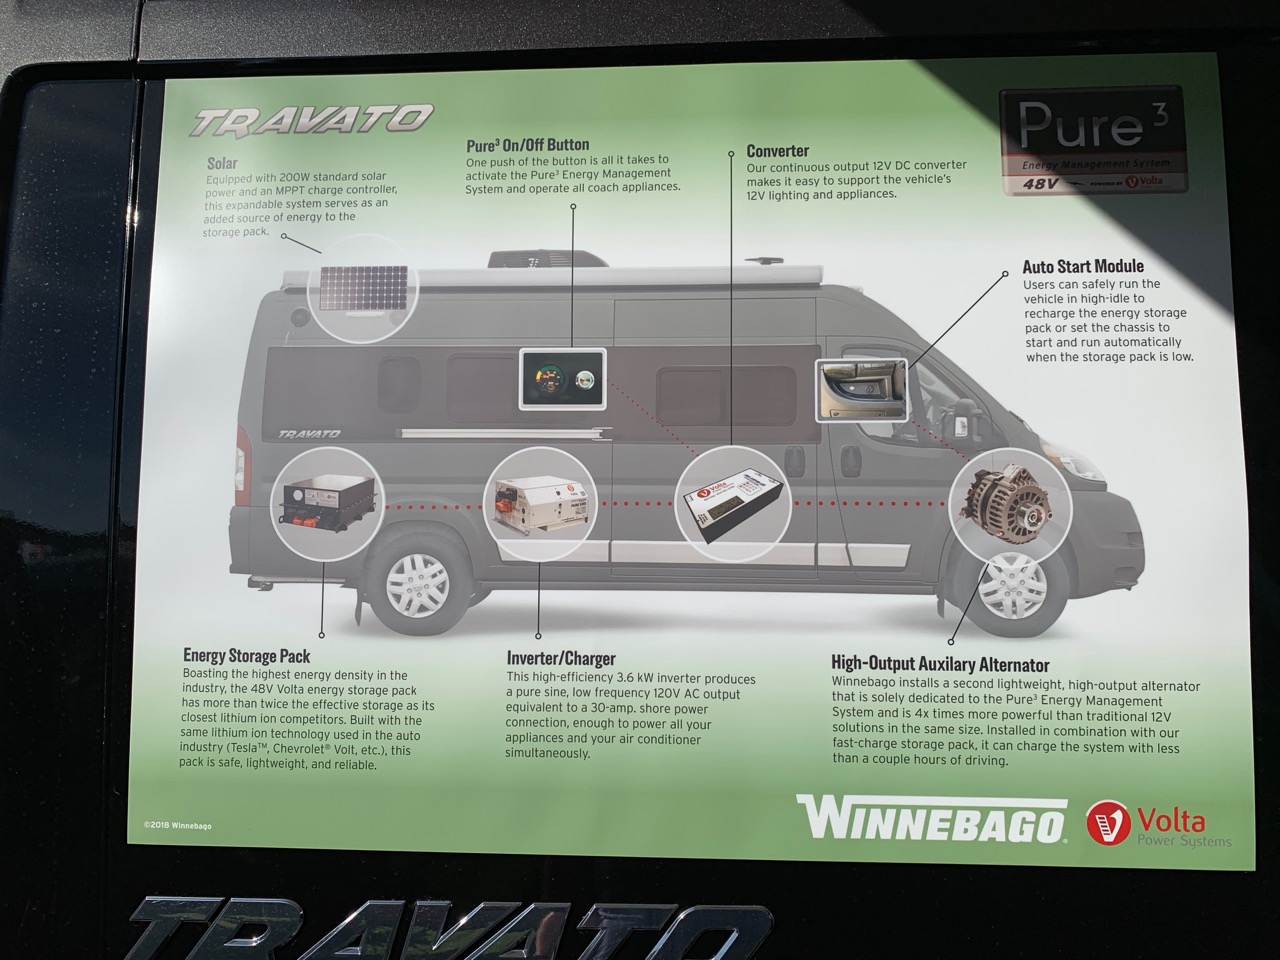
Or if you really are redoing a vehicle power system from complete scratch, going 48V with an integrated systems from Volta Power Systems is an option that some high-end custom converters (and a few Winnebago models – like the Travato GL) are now using.
For us – we’ve been using a homemade LFP battery bank since 2011, and we knew we didn’t want to repeat that sort of roll-your-own project again. Been there, got that merit badge.
Instead – we decided to was to see what was possible with commercially available options.
When I was sketching out our dream electrical setup I set out researching the most viable commercially available next generation technologies to consider for Y-Not now that regular LFP has begun to go mainstream.
Nickel Manganese Cobalt Oxide (NMC) Batteries?
The most interesting new lithium battery chemistry I have been tracking is Nickel Manganese Cobalt Oxide (shorthand: NMC), a close cousin of lithium iron phosphate (LFP) batteries.
NMC batteries are both denser and lighter, allowing for a major jump up in energy storage in a small space.
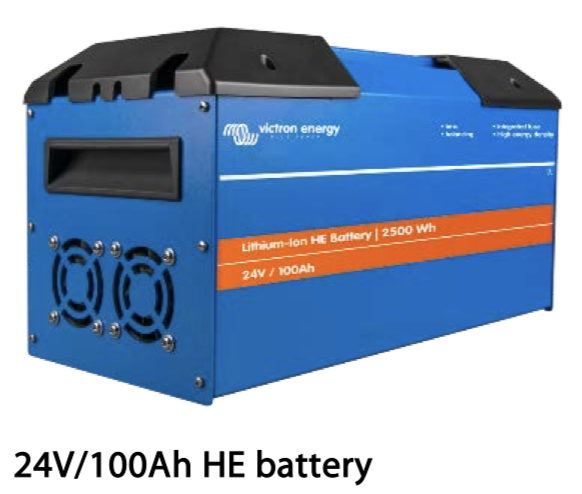
To illustrate – here is Victron’s 24V 100Ah LFP and NMC batteries compared:
- Lithium-Ion Battery (LFP) 24V/100Ah – 30 kg (66 lbs) – 592 x 154 x 278 mm – 86 Wh/kg
- Lithium-Ion HE Battery (NMC) 24V/100Ah – 15.7 kg (35 lbs) – 362 x 193 x 214 mm – 159 Wh/kg
That is a pretty amazing increase in energy density!
The most significant downside – NMC batteries potentially will not last as long as LFP.
Victron rates their LFP batteries to last at least 3,000 80% discharge cycles, while they only promise 2,000 cycles from NMC.
The up front costs are roughly the same – but the lifetime math just isn’t as compelling.
NMC batteries are also not as fundamentally safe as LFP batteries, making it really important to pair with a great battery management system to protect the batteries (and you) from any potential failures. This is probably not the ideal chemistry for roll-your-own tinkering.
Under our corner sofa, I worked out that we would have space for 5x Victron HE batteries:
- 5x Victron HE 24V/100Ah (500Ah @ 24V) — 14.5″ x 38.0″ x 8.5″ – 153lbs
But the other catch with NMC batteries… they are still new and not as readily available.
I am only aware of Victron and Volta offering NMC based batteries at the moment in any sort of supported fashion.
When we checked in with Victron, they let us know that they could get us HE batteries – but it would take several months to get the NMC batteries we were interested in shipped over from Europe.
We just didn’t have that sort of flexibility, so we decided to explore other options.
Exploring Battle Born “Drop In” Batteries
We were curious about the state of “drop in” LFP batteries, since we get asked about them so often and it was very tempting to not need to worry about the complexity of an external BMS again.
In the past we’ve run across some very underwhelming “drop in” offerings, and years ago were actually pitched repeatedly by a few manufacturers making outlandish technical claims.
But we had heard things had gotten much better in the battery world in more recent years – and in particular we had seen a ton of good buzz around Battle Born (aka Dragonfly Energy) in the RVing world.
We were also initially a bit skeptical too, as Battle Born had seemingly come out of nowhere and was now installed on just about every major YouTuber or Instagrammer’s RV or boat.
We reached out to learn more – and Battle Born impressed us by being able to geek out and intelligently answer the most technical questions we could throw at them.
And it turns out they were actually long-time fans of ours as well, and the Battle Born founders had been following our bus project long before they had even started their company.
Once we started chatting and had hit it off – they told us that they loved the idea of sending us a bank of batteries for extended loan to test out to see what we thought of them, since we’ve had more experience with RV lithium systems than just about anyone.
They understood we were just looking for a quick solution for that cruising season, and if we wanted to send the batteries back and switch to Victron HE down the road – they were perfectly fine with that. They just wanted our feedback along the way.
The way I see it – Victron’s external BMS complexity is better for large systems, Battle Born’s simplicity and overall affordability is ideal for smaller systems. And what we were hoping to put into Y-Not was a medium-sized power system that really could go either way.
The catch was – we’d be giving up some capacity in the space we had available:
- 5x Victron HE 24V/100Ah (500Ah @ 24V) — 38″ x 14.5″ x 8.5″ – 153lbs
- 6x Battle Born GC2 12V/100Ah (300Ah @ 24V) — 41.16″ x 10.32″ x 11″ – 180lbs
Would a 300Ah bank be enough for us?
Battery Bank Size Anxiety
So now that we’ve lived with the system for a while – is 300Ah proving to be enough for us?
Mostly it is – especially now that we have solar supplementing during the day.
But Y-Not is a power hungry girl – with a fridge, freezer, ice maker, beer fridge, big TV, and all sorts of other tech on board – and if we aren’t careful we can easily burn through 200Ah overnight.
With just 300Ah of capacity, we have to keep a close eye on the battery state each evening to make sure we don’t run out of juice and trigger a BMS shutdown before dawn.
More capacity would make that much less of a worry – and could get us to a place of needing to top off with the generator only every other day or so.
We did leave room to double the size of the battery bank by using the next under-sofa chamber – so in the future we will either double the number of Battle Born GC2 batteries, switch to Victron HE batteries, or perhaps explore other potential options that might become available.
We honestly haven’t decided which path to go next…
Thoughts On Battle Born?
Overall – we have been impressed with both the Battle Born gear and team, and we’ve been surprised that we’ve not been feeling any urgency to send the Battle Born bank back.
For anyone who is looking for a simple and relatively straightforward way to embrace lithium, we really like the options that Battle Born has put together. Battle Born has struck a great balance of value, support, quality, and technology that seems to be at a sweet spot for a lot of people.
 The upside of Battle Born is that their batteries take care of themselves – with no external BMS control or monitoring required.
But this is also the downside – you can’t geek out over seeing individual cell voltages, and you will never know what (if any) faults may have triggered the internal BMS to shut down.
I’d love it if Battle Born offered a bit more of a window into the inner workings of their batteries – but for a lot of people this is just unnecessary geekery.
It’s marvelous that there are now mainstream options available (complete with an impressive 10-year warranty and tech support) for those who don’t want to geek out, or start with raw cells like we had to years ago!
And we’re really impressed with how the Battle Born team has authentically become part of the very communities they are working within, inlcuding supporting major projects (like The RVers TV Show!).
They have been doing a remarkable job reaching out into the RVing and boating community to help demystify lithium and make easy aftermarket installations not very intimidating at all.
Offering a ten year warranty says a lot – and we are cautiously optimistic that Battle Born is on a path to be around support their products for the long haul, and that they have designed a system that hopefully will rarely need any support at all once installed.
2024 Update: We continued to love our Battle Born batteries, and even got to tour their facility in NV on an RV trip out west. One of our batteries ended up having a warranty issue, so they opted to send us a new set before we set off resuming our Great Loop post-pandemic. We decided then to go with their 24v batteries, and now have 400AH installed. Which is proving to be a very well suited amount of capacity for our needs.
Y-Not’s Victron Powered Inverter & Monitoring System
When we built our bus electrical system, we picked a Victron MultiPlus 3000 because it was one of the only inverter options available at the time that could combine shore power and battery power to allow us to plug our bus into 15A (driveway camping!) or 30A plugs without worrying about blowing a fuse when high-current loads kicked on.
If we needed more power then the shore plug could provide – the inverter could supplement off of battery automatically.
We dove into the reasons why we would never want an inverter lacking this capability in our old post:
Boosted Electrons = Better Views
We’ve been very impressed with how well our MultiPlus has worked out over the years – and equally impressed with Victron as a company.
We even became beta testers for them when they brought the awesome CCGX system monitoring display out, and we became even further hooked.
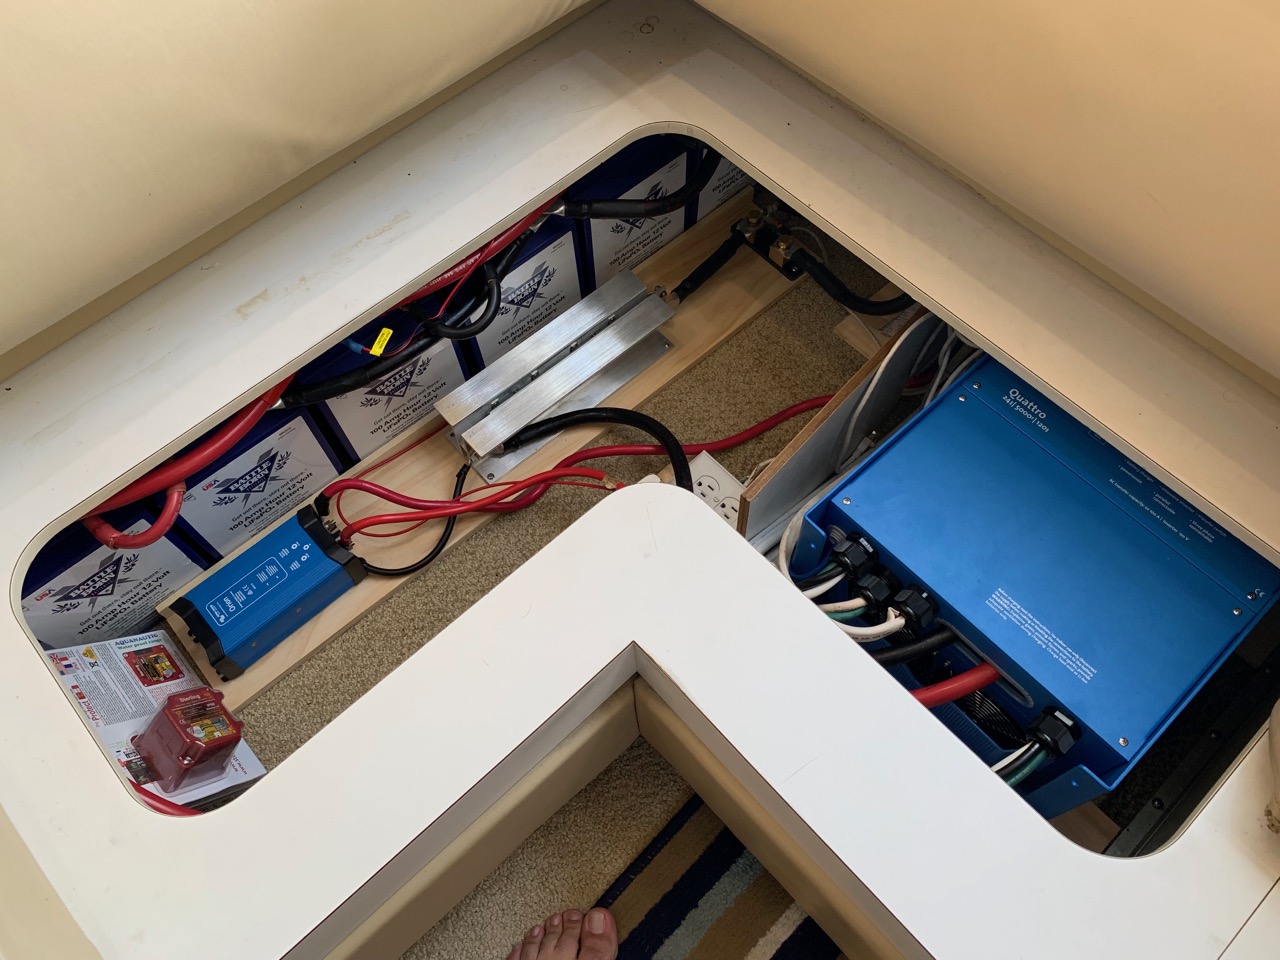
So for Y-Not – the obvious choice for our new inverter was the Victron Quattro 24/5000.
The Quattro is pretty much the king of inverters, and it is built like a tank. It takes in AC input from both shore and the generator, eliminating the need for any external transfer switches. It can put out a massive 120 amps of charging current, topping off our batteries quickly and minimizing generator runtime. And it of course has the PowerAssist feature that we love, letting us use the microwave and two air conditioners simultaneously off our smaller 6kw generator (read about our generator downsizing project) without blowing a circuit or melting down.
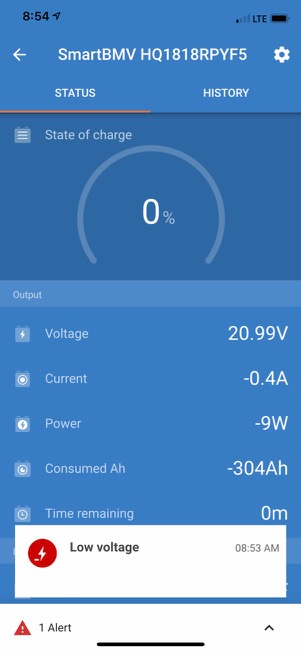
Completing our core electrical setup is a Victron BMV-712 Smart battery monitor, which gives us an accurate gas gauge for our system.
And instead of the CCGX display, we went with a Victron Venus – which is basically an internet connected hub for all the components of the system that lets us use an iPad as an always on display instead of a permanently mounted small screen.
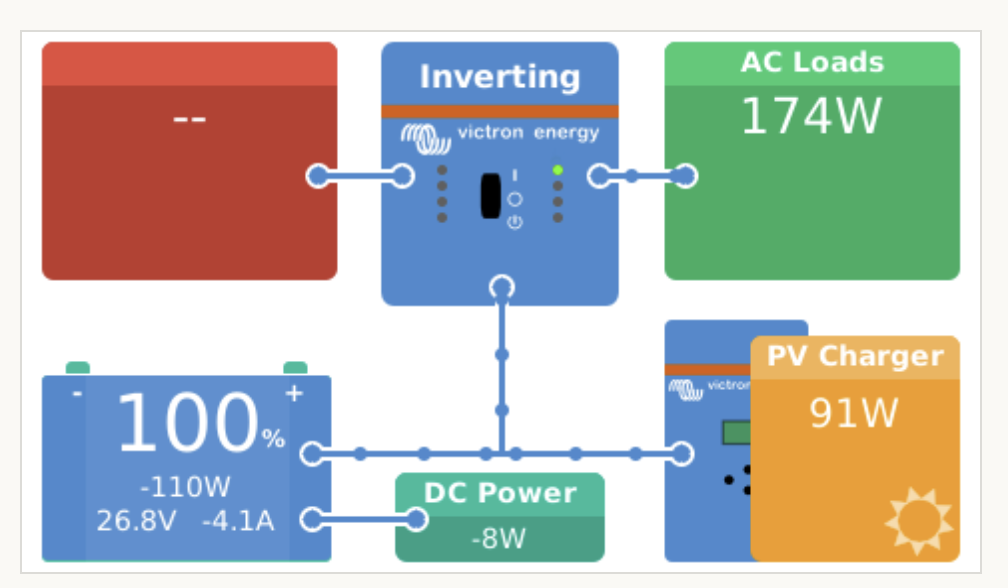
Thanks to the Venus, we can bring up our system’s electrical dashboard from anywhere online.
And via Victron’s VRM portal, we can dive even deeper to analyze our energy production and consumption too.
2022 Update: An extended off grid post-hurricane experience had us reconfiguring things for better efficiency. We added in a smaller inverter to put the fridge on, and now keep the Quattro off unless needed.
So How’s It Working Out?
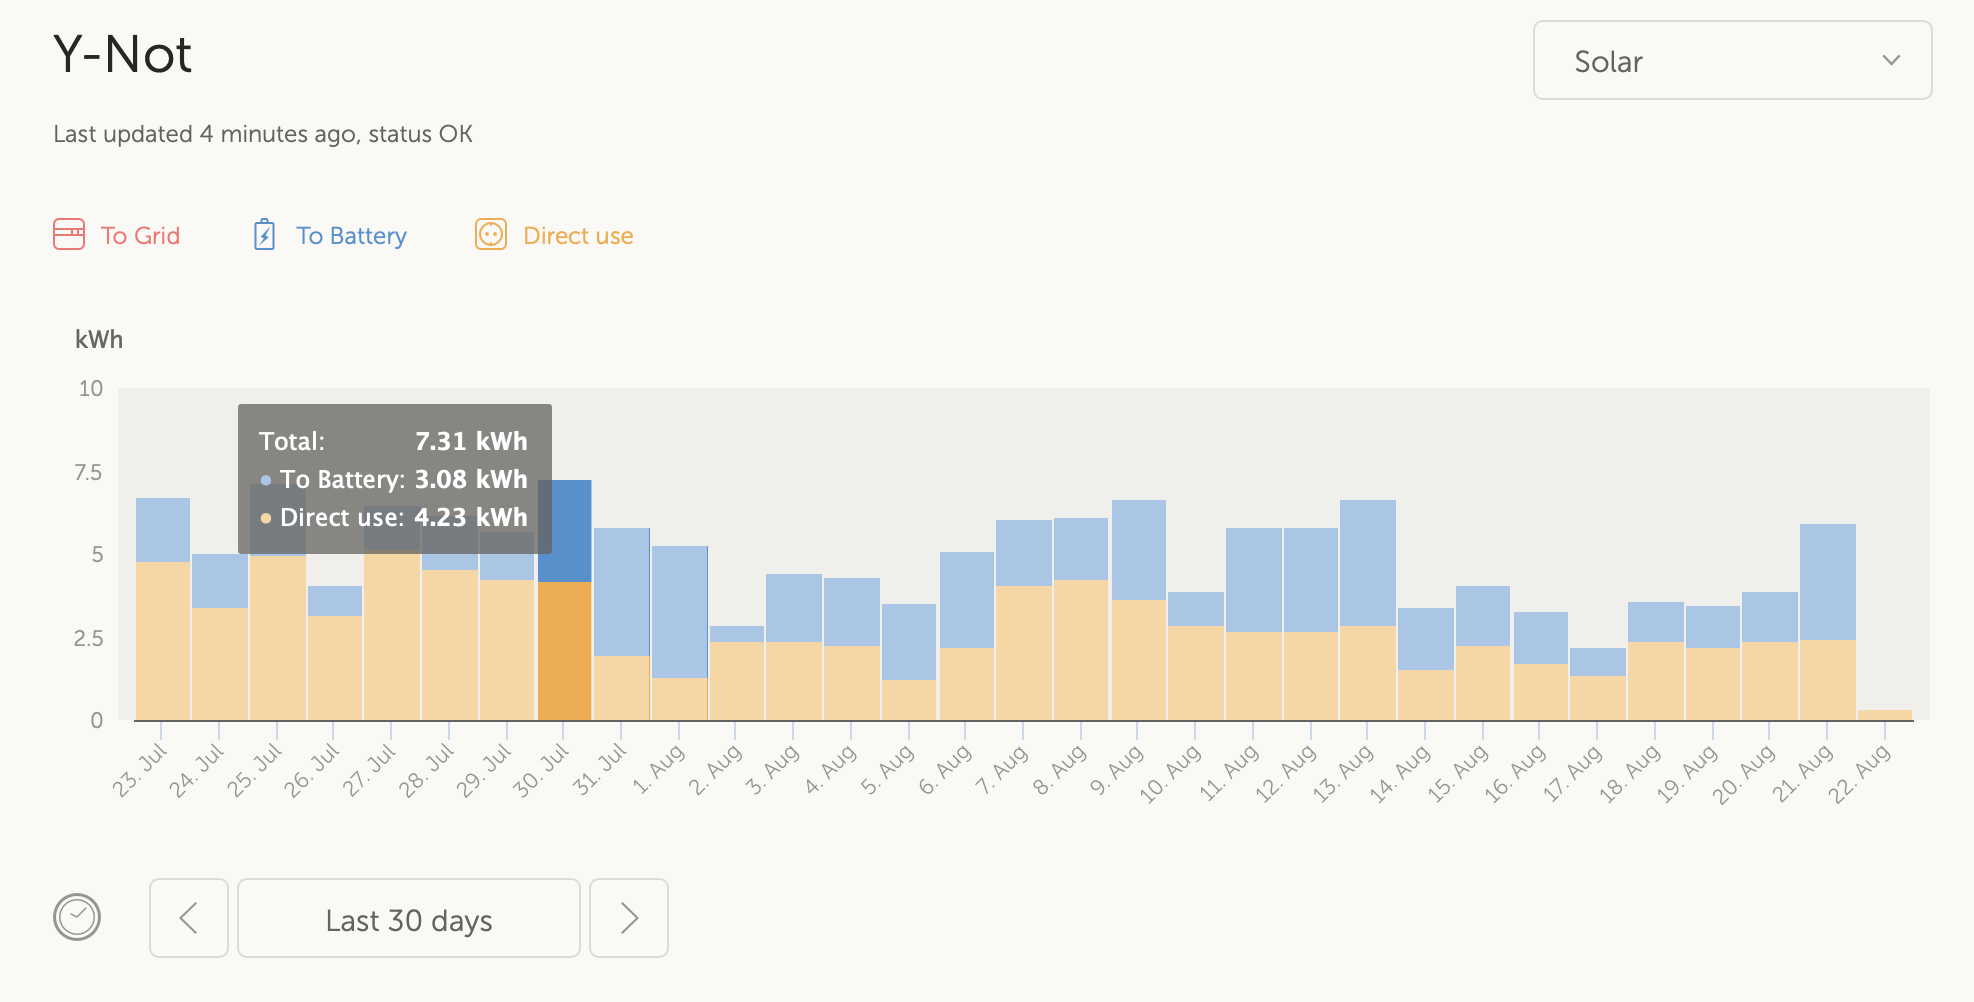
Though we have had the lithium batteries installed for almost a year now, we actually don’t have a lot of long-term data to go on yet tracking the complete system with lithium and solar combined.
Unfortunately due to all of the challenges of lining up contractors, the final solar panel installation happened just as the warmer summer months were creeping up on us – and with record heat and a cat on board we’ve needed plenty of AC time when at anchor.
Since our solar and battery system can’t sustain running an AC several hours a day every day (we can run an AC off battery & inverter for a few hours however), we have been generator dependent this summer as we’re cruising the southeast.
However, we were able to directly compare our two cruises up and down the St. Johns River.
In October 2018 (nice fall weather without much need for AC) we had just the 300AH of LFP (no solar yet) – and needed to run the generator an average of 4.5 hours a day to keep the batteries topped up.
On our return trip in March 2019 (nice spring weather without much need for AC) with just two panels installed – we were able to cut our generator time down to 2 hours a day.
Our hypothesis is that our completed four panel system in temperate weather should be able to keep up with most our energy needs on sunny days with minimal generator time – if air conditioning isn’t needed.
And if we do run the AC for an hour in the afternoon to cool off during the worst of any heat, that should be all we need to keep our batteries topped up too.
Remaining Planned Electrical Upgrades
We still have a few electrical projects that we plan to tackle – some soon, some further out.
- 24V High-Output Alternator – Right now we have no way to charge our house batteries off the boat engines, but we will soon be adding a high-output 24V alternator that will be able to charge the batteries rapidly while underway, and which will be able to provide enough power to run an AC or two directly off the engine without needing the generator. (2025 Update: This project keeps getting pushed.. maybe one day? It really hasn’t been a high priority, as we barely need to run the generator as we’ve dialed things in.)
- 24V Fridge & Freezer – We’ve pulled the wires and will soon install a jack to power our chest freezer off of 24V power instead of AC, which will increase its efficiency. And at some point we will probably replace our residential apartment-style AC-powered fridge in the galley with an energy efficient 24V marine fridge too. Once these projects are handled, we will be able to turn the inverter off overnight when we don’t need it – saving a ton of power and making it so that on most day’s we’ll make more energy via solar than we consume.(Update: As of 2022, the chest freezer is on direct 24v, and we still have our residential fridge but now run it off a smaller dedicated inverter.)
- Larger Battery Bank – As discussed above, we really want at least 500Ah on board to better match our daily electrical needs (Update: in 2024 we had a warranty replacement, and went with 400AH at 24v, and it’s been working out great).
- More Solar? – We have the roof space for two more panels, and maybe someday we will add them. But we expect that upgrade will be years away, if ever. (2025 update – we have no desire to add more solar, our balance has worked out fine!).
Concluding Thoughts
So there you have it, a deep dive tour into Y-Not’s electrical system as it stands in the summer of 2019.
We will of course always be tweaking and tinkering with things, but overall we are very happy with the setup we have.
Here’s the core gear list:
- Batteries & BMS:
6 x 100AH Battle Born GC2 wired up for 300AH at 24vReplaced in 2024 with 8x 50AH Battle Born 24v - Inverter / Charger: Victron Quattro 24/5000 + Victron Energy Phoenix 800VA 24v
- System Control: Victron Venux GX
- Battery Monitor: Victron BMV712 Smart (Bluetooth!)
- DC Converter: Victron Orion 70A 24v to 12v Converter
- Solar Charge Controller: Victron SmartSolar MPPT 100/50
- Solar Panels: 4x Solaria PowerXT-360 360W (1,440 Watts Total)
I hope this plants some seeds for others looking to tackle similar electrical projects of their own, and we welcome general comments here.
But please don’t ask us for advice, feedback, or for help designing your system!
We just don’t have time to keep up on researching all the various options that are available out there (we already do that for mobile internet options professionally), and we have only focused on tracking down the gear that meets our particular installation challenges and needs.
If you’re ready to tackle your own installation, it’s best to steer those question to the installer or vendors you’ll be utilizing.
We share this mainly for our own documentation of the project, and for fun. If you’ve appreciated the time and effort it took to create this post and video (well over 80 hours) – we sure do appreciate your words of gratitude, or using the Tip Jar at the bottom of the page.
For more reading on these geeky topics, start here…
Our lithium series:
https://www.technomadia.com/lithium
Our solar series:

Great article – well written by a well-informed person. Being an engineer, it was easy for me to follow, but you managed to convey fairly technical information in layman’s terms! Thank you.
But I have a further comment, not related to the technical article, but to the “Say Thanks” section. It is to do with this:
“If you feel inspired to send a financial gift – please support a cause, person or small business more in need than us. Thanks!”
I just wanted to say – that speaks volumes about you, as individuals. Selfless, and considerate. Refreshing in today’s world!
Cheers, and stay safe.
Arvind Maharaj (Perth, Western Australia)
Great post! Thanks so much for all of the details about your thought processes and research, the many options you considered, and where you ended up. Fantastic problem solving. For me, this wasn’t too technical at all and it helps me considerably as we manage our own solar and LFP system using Zamp, Battle Born, and Victron components and decide what, if any, further tweaks or improvements we need to make to that system. (We hate listening to our generator, so we’re basically realizing that more solar capacity would always be helpful, even though we have 1190 watts now.) Thanks for all of your hard (and long) work on this post.
Wooo… Well written post, but a lot of it way over my head. Enjoyed browsing thru it, tho, knowing that if we ever wanted to upgrade our modest RV I’d know where to come for current (no pun intended) information. You guys ARE Geeky, AND very cool.
Happy cruising.
Thanks for the excellent, detailed write-up. I also watched the video version (on YouTube). Many ”thumbs up” to both of you.
Amazing write-up! What a wealth of information. Thanks so much for taking the time to share all of this. I’m really excited to watch your updates and experiences as you put this all into action.
Thanks for the circuit diagram. That really helped me understand how you are combining 3 power sources. My initial solar install on our boat just took the 12v power and moved them to the Lithium batteries and a 2000w inverter that has an extension cord run to our fridge that we manually switch from 120v to the inverter when away from shore power. We love not using our generator!
Thanks for another great geeky article. You always make me geek out a bit Chris. I appreciate you sharing your electrical installs/upgrades.
Great article Chris! Thank you!! Just a couple questions that may help others:
1. Why not use the 24V batteries offered by BattleBorn? Need a different charger/inverter/controller? No gain? I know they are only 50Ah…but I’m not smart enough to know why you didn’t choose that since you wanted 24V.
2. Is there any cell-to-cell heat concerns (I recall you mentioning those in the bus).
3. Any cooling fans/ventilation needed in the battery compartment?
I have to say, those batteries sound like the cat’s meow for mobile folks…thanks again!
The form factor of the GC2 batteries better fit our space, and Battle Born does not have a 24V version (yet?) in this size. I actually think they didn’t have any 24V options last year when we did this, but I could be wrong. But overall there really isn’t much difference between wiring up 6x 50Ah 24V batteries or 6x 100Ah 12V batteries.
The batteries themselves do not seem to get hot under use at all – but we do have ventilation slats in the chamber and plan to add an additional cooling fan since the chamber as a whole can start to get warm due to proximity to the inverter under a full 120A charging load.
For now – if we are charging for more than an hour at 120A, I just prop the sofa open for extra airflow until I have an active fan.
– Chris
Wow..! Do you guys even have time to sleep? Although some of it was way over my head, this was very interesting and informative. Excellent work as always… : )